Why in the 21st century would you still do black and white photos? How does a black and white photo affect your emotions? How to convert to black and white in a creative manner and with which tools?
I will share with you:
- why black and white and photography are intimately linked
- the link between black and white photo and emotions
- how to convert a photo in black and white creatively
- a practical case with a landscape photo
Foreword
Succeeding in making remarkable photos means making photos that provoke emotions that are most faithful to the emotions you felt when shooting. Focused on the theory of emotions, I designed a 6-step method for learning photography first with what you feel. Development is the 5th step to achieving it, and developing color is one of the 6 essential development techniques to be known in photography.

Black and White Pictures, Inseparable From Photography
Photography is intimately linked from its origins with these mirror images of the outside world, transcribed in black and white. It was not to stand out from the painting, nor to be an ultimate refinement of the engraving. But because of the 19th century technological limitations, it was not possible to make color photography in quality and on a large scale. It will be necessary to wait until the beginning of the 20th century to see the explosion of color photography, in particular with the autochromes of the Lumière brothers.
For us as Westerners, to see a black and white photo is not abnormal: we have been constantly fed with black and white images during our life, so we know how to decipher it, to see a subject, a composition, a light.
On the other hand, show a black and white photo to a native living in a remote tribe of Papua: this photo will certainly cause quite another reaction. This Papuan will be more stunned by the supernatural absence of color, rather than seeing the subject that has been captured in the photo.
Black and white is totally part of our popular visual culture: photography was first black and white, and black and white is always photography! We do not even ask the question: black and white is totally accepted, and our disbelief suspended in front of an image that has however replaced a color palette with monochrome tones.
The Black And White And The Emotions Of Your Photo
Today, the increased capacities of digital photography and its tools (computer, software, printer, …) allow to produce color photos with a richness and quality never reached in history. So why make black-and-white photos in the 21st century, when hundreds of scientists have worked hard to make color photography possible?
Black and white is in fact of immense quality: because it removes information (colors) and also because it is unconsciously accepted by all, it allows our eye to focus on “something else” without being distracted, nor shocked. If you close your eyes, then you will be attentive to sounds, touch, smells and even taste. It’s the same thing in photography: remove the color, and as a viewer you’ll be more attentive to the subject, the composition, the light, the development or the presentation of the photo.
And when you’ve taken a picture with an intense emotional charge in your eyes, maybe the color is more distractive than attractive in your photo. Moreover, given its weight in the photographic tradition, black and white adds a timeless effect that reinforces the universality and power of the captured subject.
A black-and-white photograph actually participates in the process of distilling your emotions, which you started with:
- your choice of the subject’s disposition,
- your choice of shooting techniques,
- your choice of framing the subject thanks to the composition,
- your choice of light against the subject, and in the end
- your choice of developing the photo with black and white conversion
Making a photo in black and white is making the choice to make your emotions more alive. And perhaps more unintimate too. A great black and white photo can be much more sensitive and personal, than its equivalent in color.
In Plutchik’s theory of emotions, making the emotions more intense is to exalt the primary emotions at the core center of the wheel of emotions.

Convert Creatively A Photo To Black And White
Any photo editing app has the black-and-white conversation feature. Even if at first glance, this seems to be just one click operation, your creative process deserves better than off-the-shelf recipes to make a compelling black-and-white photo.
You must first know that a digital color image is in fact the additive combination of 3 layers of red, green and blue monochrome images. The black-and-white conversion of a color image is considering each of its red, green and blue primary layers as a weighted average.
From a technical point of view, the “good” conversion to black and white is to make a properly weighted average for each color pixel to have a monochrome pixel of the same brightness.
But from a creative point of view, there is an infinite amount of conversions to black and white: it all depends on the weight you give to the red, green or blue that has been recorded on your camera sensor. You can take only one component, or 2 only, or 2 majors and 1 minor. Each variation gives a different result simply because the light with all its colors breaks down into different luminosities for red, green or blue.

Before the possibilities of digital photography, black-and-white silver-halide photographers used color filters placed in front of their lens. They were changing color proportions of visible light to create different black-and-white balance of tones on their film. In the digital age, photo editing applications like Adobe Lightroom, Google Snapseed, Affinity Photo, Adobe Photoshop and many others, offer now the same possibility in 1 click by either:
- Simulating the addition of a color filter that will change the tonal balance of your photo, or
- Changing the proportions of red, green and blue components directly in black-and-white conversion


What is the best black-and-white conversion to have? You must find the best contrast of tones that values your subject and its environment. The right balance of tones should both reveal as much details as possible where you want the eye to linger, and mitigate areas of less interest.
But converting color to black-and-white is just one step in the process of developing your photo. Then you will also have to make sure to:
- Choose the correct tonality: global tonality and potentially local tones
- Find the right contrast: at a global level and possibly with micro-contrast
always to align your development with all the emotions you have captured and want to share in picture.
A Practical Case
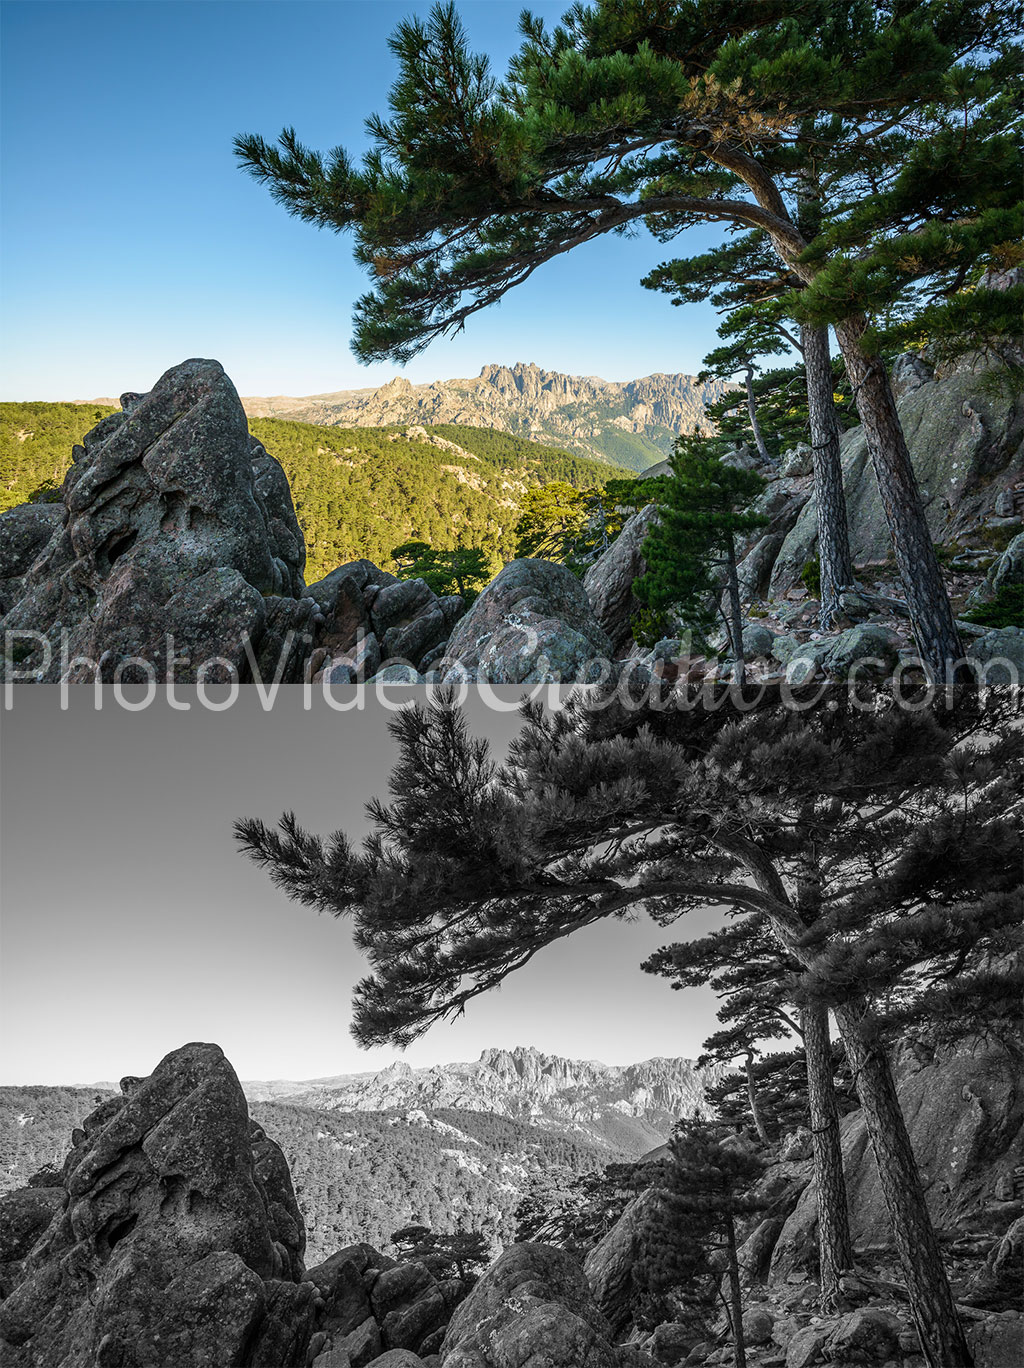
I took the picture below in Corsica near the Needles of Bavella, on a cloudless summer morning. The place is strikingly beautiful, and at the early hour when I was able to go there, still free from hikers. This scene immediately attracted me because one sees the “Needles” with 2 strong symbols that are the laricio pines and the rocks of granite carved by the elements.
The light being quite flat on the massif in the distance, I found the colors excessively common. But it is especially the foreground with the rock and the pines that guided me in my choice. Indeed, being on a shaded slope, the light comes from the sky dome and is therefore a diffuse light: the shadows are very soft and quite conducive to a monochrome photo. All the conditions were there for me to develop my photo in black and white.
I fine-tuned the black-and-white conversion to decrease the brightness of the blue tints, so that the sky is a bit darker than the Needles. And I finally added some micro-contrast (Clarity in Adobe Lightroom) to bring out textures and more contrasty shades of gray.

Let’s Go On Together!
Learn how to photograph with my 6-step method to make your photos first with your emotions. An intuitive approach that focus on what you are feeling, before considering any tools and techniques!
Then understand why development in photography is essential in the expression of your emotions and explore the 5 different techniques of color development:
- Color of ambient light: developing the white balance
- Intensity of colors: developing color saturation
- Attracting to your subject with color: developing selective/local saturation
- Harmony of colors: developing a color palette
- Monochrome tones: developing in black and white (this post)
Do not miss my future posts to better capture and share your emotions in picture: subscribe to my newsletter and get my free eBook!
Do you like what you’ve learned? Share this article with your loved ones!