A photo in itself is never too dark, too bright or “just right”. The tonality of your photo should be related to your subject and the emotions you were experiencing in front of it. But neither your camera, nor your development software or “app” will know how to interpret your emotions and choose for you the “right” tonality.
I will share with you:
- Why there is no universal tonality among the 3 possible ones,
- The emotions related to bright, balanced and dark tonalities,
- How to create the tonality of your choice when shooting and then with your development software.
Before We Begin
The emotions that you manage to capture and share in your photos are in my eyes the only criterion for making remarkable photos. Focused on the theory of emotions, I designed a 6-step method for learning photography first with what you feel. Development is the 5th step to achieving it, and tonality is one of the 6 essential development techniques to be known in photography.
3 Possible Tonalities For a Photo, But No Universal Tonality
Look at the 3 portraits below. It is actually the same shot but with different development parameters creating 3 photos with distinct tonalities.

Each photo shows one of the 3 possible tonalities:
- The balanced, normal, standard, … tonality
- The bright, high key tonality
- The dark, low key tonality
Maybe you say that from the moment a photograph is correctly exposed, it is necessarily successful? In fact, a well-exposed photo at the time of shooting often remains an impersonal picture: there is no strengthening of what you feel. The 3 portraits pictured above are technically accurate: one clearly distinguishes the subject, the light shades and the dark shades. But these nuances are expressed differently. Thus, the choice of tonality is something subjective: you will prefer this or that tonality according to what moves you. That is why there is no universal tonality. Let us see each tonality and which emotions they can express.
A Quick Reminder About The Theory of Emotions
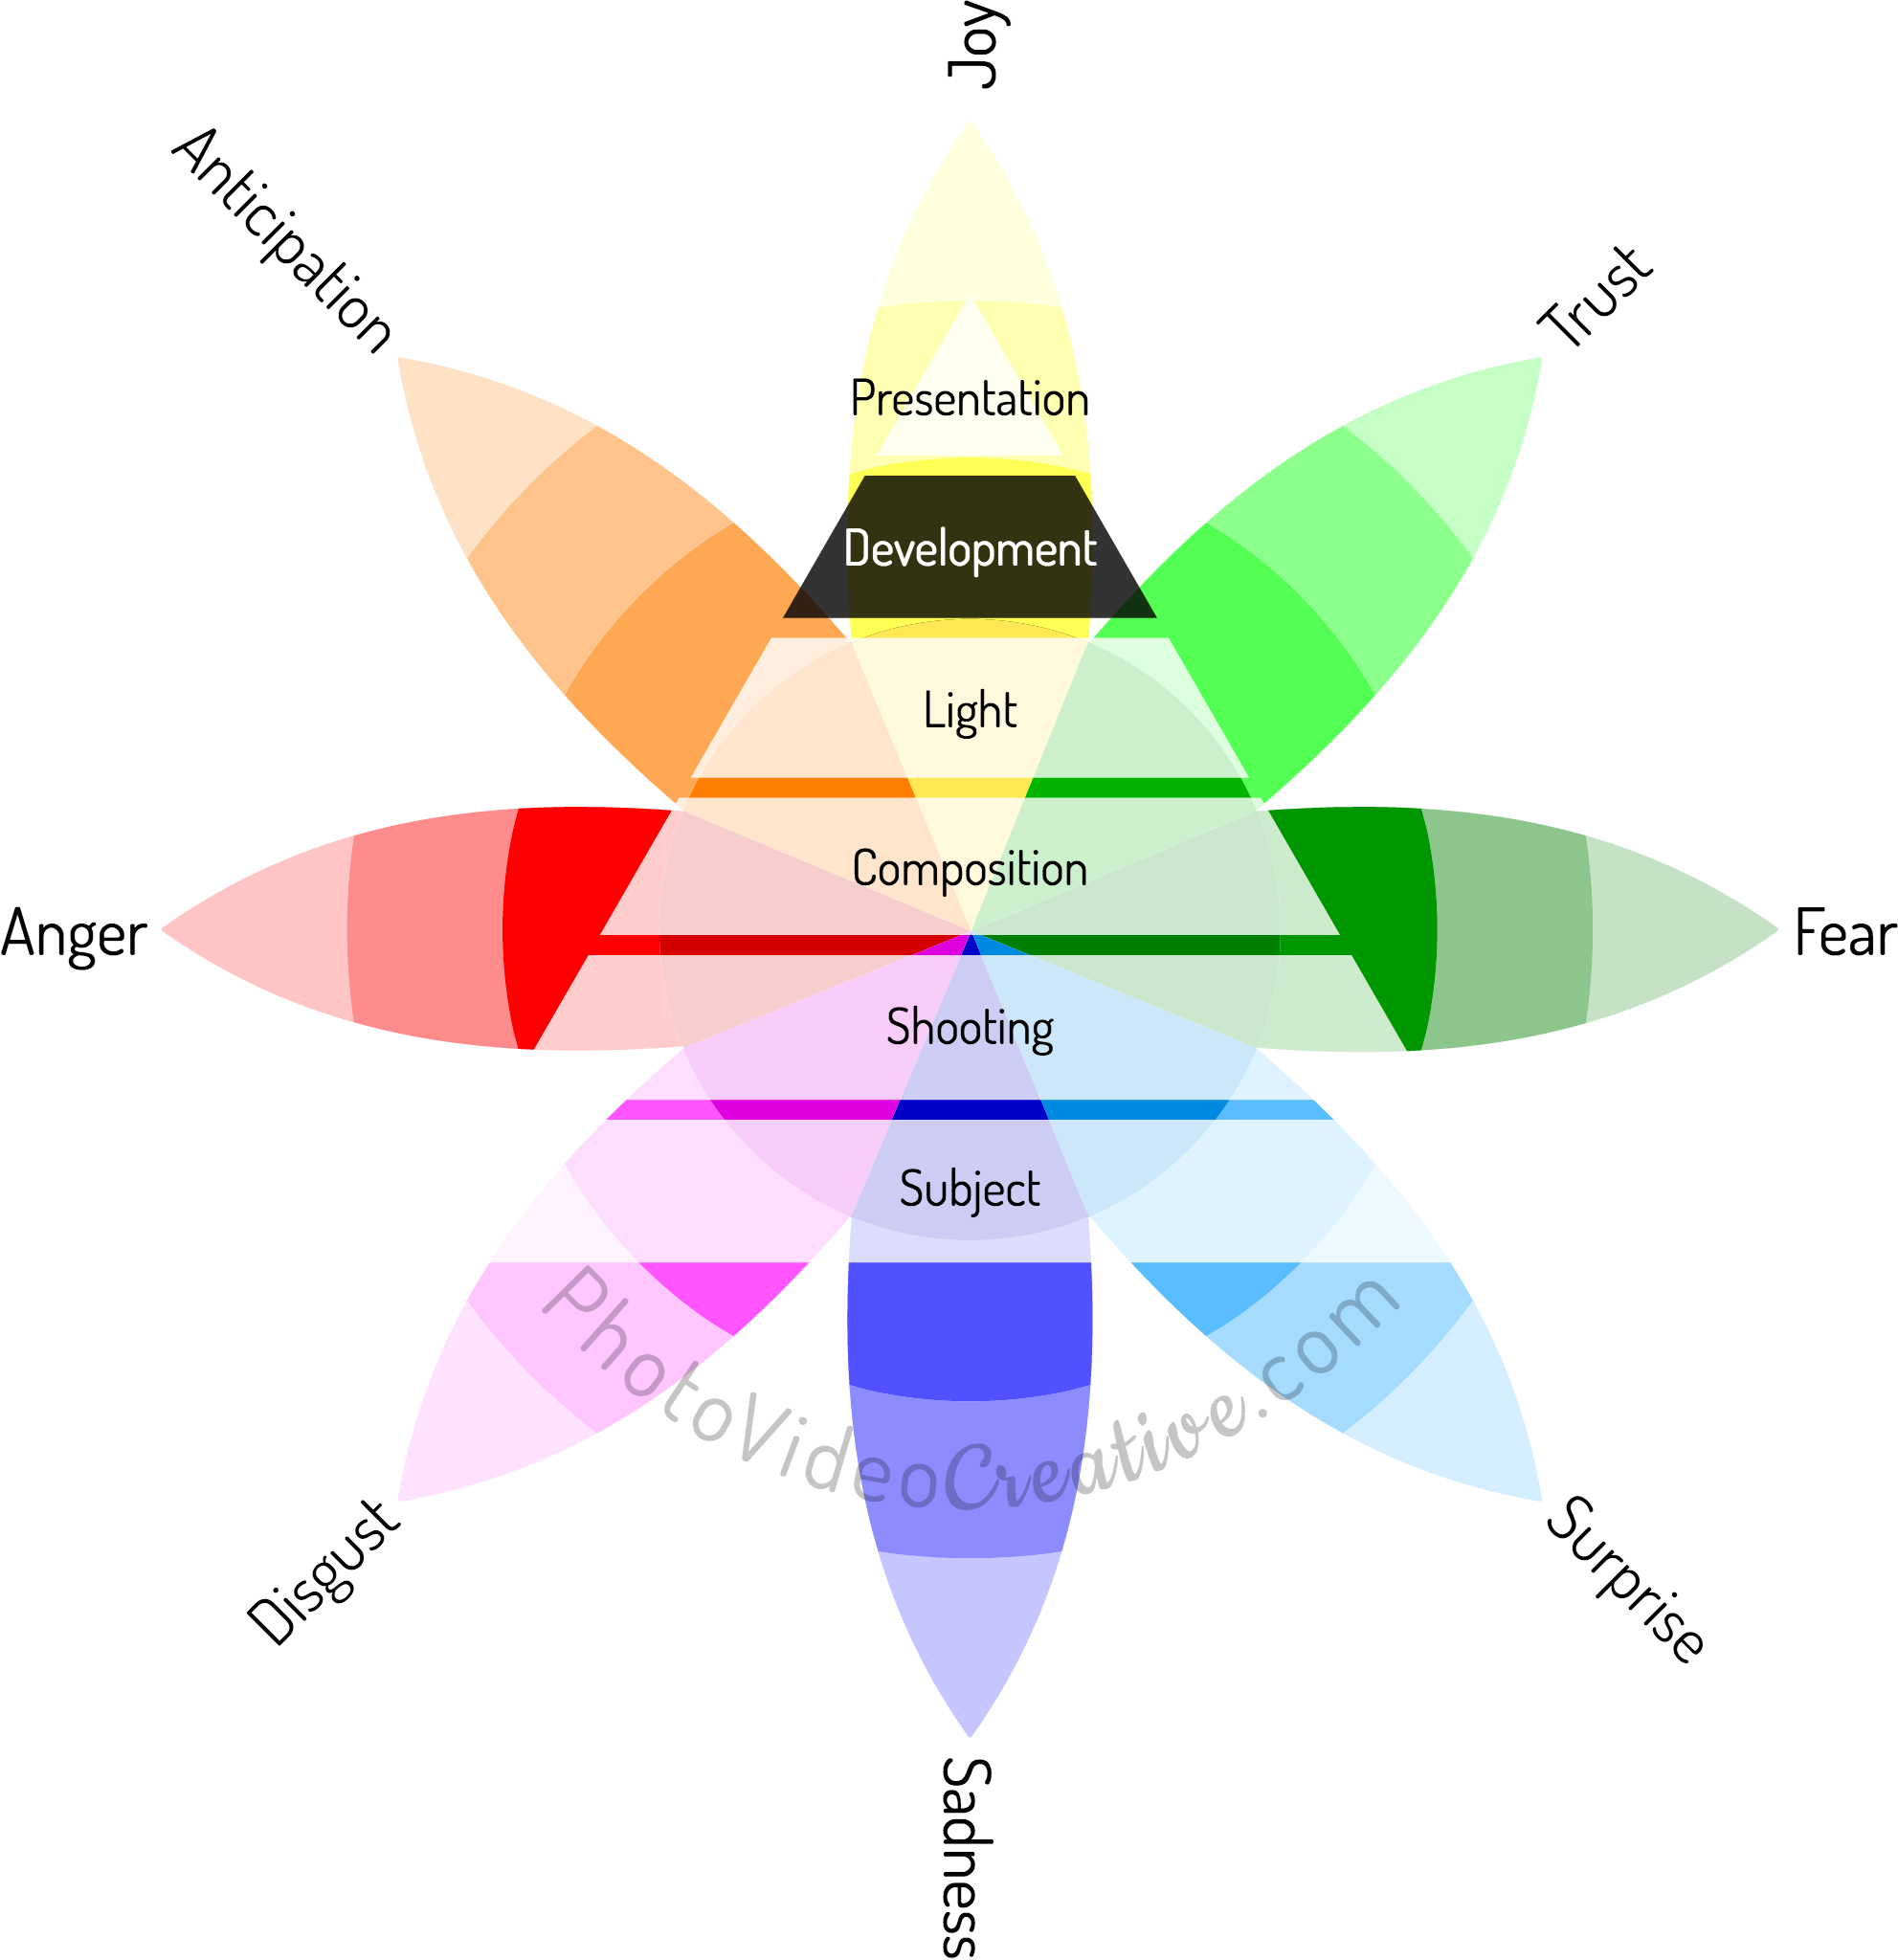
All types of emotions that we feel can be represented on a wheel with 8 primary emotions according to the theory of emotions of Plutchik. These primary emotions come in varying intensities (the most intense are at the center) and combine in 24 other emotions.

The Emotions Related to The Tonalities of Your Photo
Emotions Related to Balanced Tonality
A balanced / normal tonality photo will leave intact the emotions it releases. The balanced tonality is neutral with respect to emotions.
Emotions Related to bright Tonality
A bright tonality / high key photo will generate positive emotions like:
- Joy,
- Trust,
- Anticipation,
- Optimism (Joy + Anticipation), Love (Joy + Trust)
- Surprise,
- Delight (joy + surprise)
Emotions Related to DARK Tonality
A dark tonality / low key photo will cause more interrogative, deafening or even negative emotions. First there are subtle emotions like:
- Curiosity (Trust + Surprise),
- Apprehension,
- Pensiveness,
- Annoyance,
- Boredom
or more intense emotions such as:
- Fear,
- Sadness,
- Anger,
- Disgust,
- Dominance (Anger + Trust), Pride (Anger + Joy),
- Cynicism (Disgust + Anticipation), Contempt (Disgust + Anger), Morbidity (Disgust + Joy)
- Pessimism (Sadness + Anticipation), Remorse (Sadness + Disgust),
- Awe (Fear + Surprise), Anxiety (Fear + Anticipation), Shame (Fear + Disgust)
- Outrage (Surprise + Anger)
As you can see, the bright and dark tonalities have very powerful effects on the emotions you want to convey in a photo. Let’s now see how to get the creative tonality that will emotionally reveal your photo.
How To Create The Right Tonality Of Your Photo
The expression of the tonality of your photo is done in 2 steps: first at shooting then at development.
Step #1: Tonality at Shooting
When shooting, you can choose to expose in a balanced way, or to overexpose or underexpose according to the shooting parameters of your camera. I recommend you simply stay with a normal / standard exposure: this exposure allows you to record the largest range of shades, without the pixels becoming all white or black. You will thus have all the freedom to choose your tonality at the time of development.
Also, if your camera allows this, choose to save your images in RAW format for even more nuances in dark tones and highlights than JPEG.
How do you know if your photo is exposed in a balanced way? This is the histogram that will allow you to check it. The histogram counts all the pixels of the image and accumulates them in the form of vertical bars arranged from left to right, from the darkest pixels to the lightest pixels. A histogram with a balanced exposure has bars on the central part of the graph, without having a heap against the black pixels (extreme left) or a heap against the white pixels (extreme right).

Step #2: Tonality At Development
Based on a picture exposed in a balanced way, the development in a photo software will allow you to choose your tonality. It is not enough just to play on the “Exposure” or “Brightness” setting found in software / apps like Adobe Lightroom, Apple Photos or Instagram.

For a light / high key tonality, the “Exposure”, “Blacks / Black Point”, “Highlights / Light Tones”, “Whites / White Point” settings must also be used to move the pixels to the right. A good photo with a light tonality is not a photo where the majority of the pixels have become white with a histogram blocked on the right and no pixel on the left half! Try to find the right dosage.

For a dark / low key tonality, it is necessary to play in the opposite way parameters like “Exposure”, “Whites / White Point”, “Shadows / Dark Tones”, “Blacks / Black Point” to move the mass of the pixels In the histogram to the left. Here too a good photo with dark tonality is not a picture where the majority of the pixels have become black with a blocked histogram on the left and no pixels on the right half! Find the right proportions.

Do you still think that the best tonality of your photo is the one chosen by the automatic exposure measurement of your camera or the automatic development of your software? What new tonality do you want to try and for what kind of photo? Leave me your comment, I will answer with pleasure.
Let’s Go On Together!
Learn how to photograph with my 6-step method to make your photos first with your emotions. An intuitive approach that focus on you and what you are feeling, before considering any tools and techniques!
Then understand why development in photography is essential in the expression of your emotions and explore the different development techniques:
- The development of Framing
- The development of Tonality
- The development of Color (this post)
- The development of Contrast
- The development of Geometry (soon)
- The development of Pixel Rendering (soon)
Do not miss my future posts to better capture and share your emotions in picture: subscribe to my newsletter and get my free eBook!
Do you like what you’ve learned? Share this article with your loved ones!