The history of photography shows us that the rectangular or square format of photos is not something universal.
The format proportions are measured by the ratio between the length and the width of the photo: it is the famous aspect ratio.
But why use one aspect ratio rather than another for your photo? What effects have a crop of your photo on the emotions you have captured and want to share?
I will share with you:
- Why you have to get your hands back on the aspect ratio of your photo
- A reminder about the theory of emotions
- Why reframing expresses your emotions more strongly
- 4 examples of cropping: square 1: 1, 4: 5, horizontal panorama and vertical panorama
Before We Begin
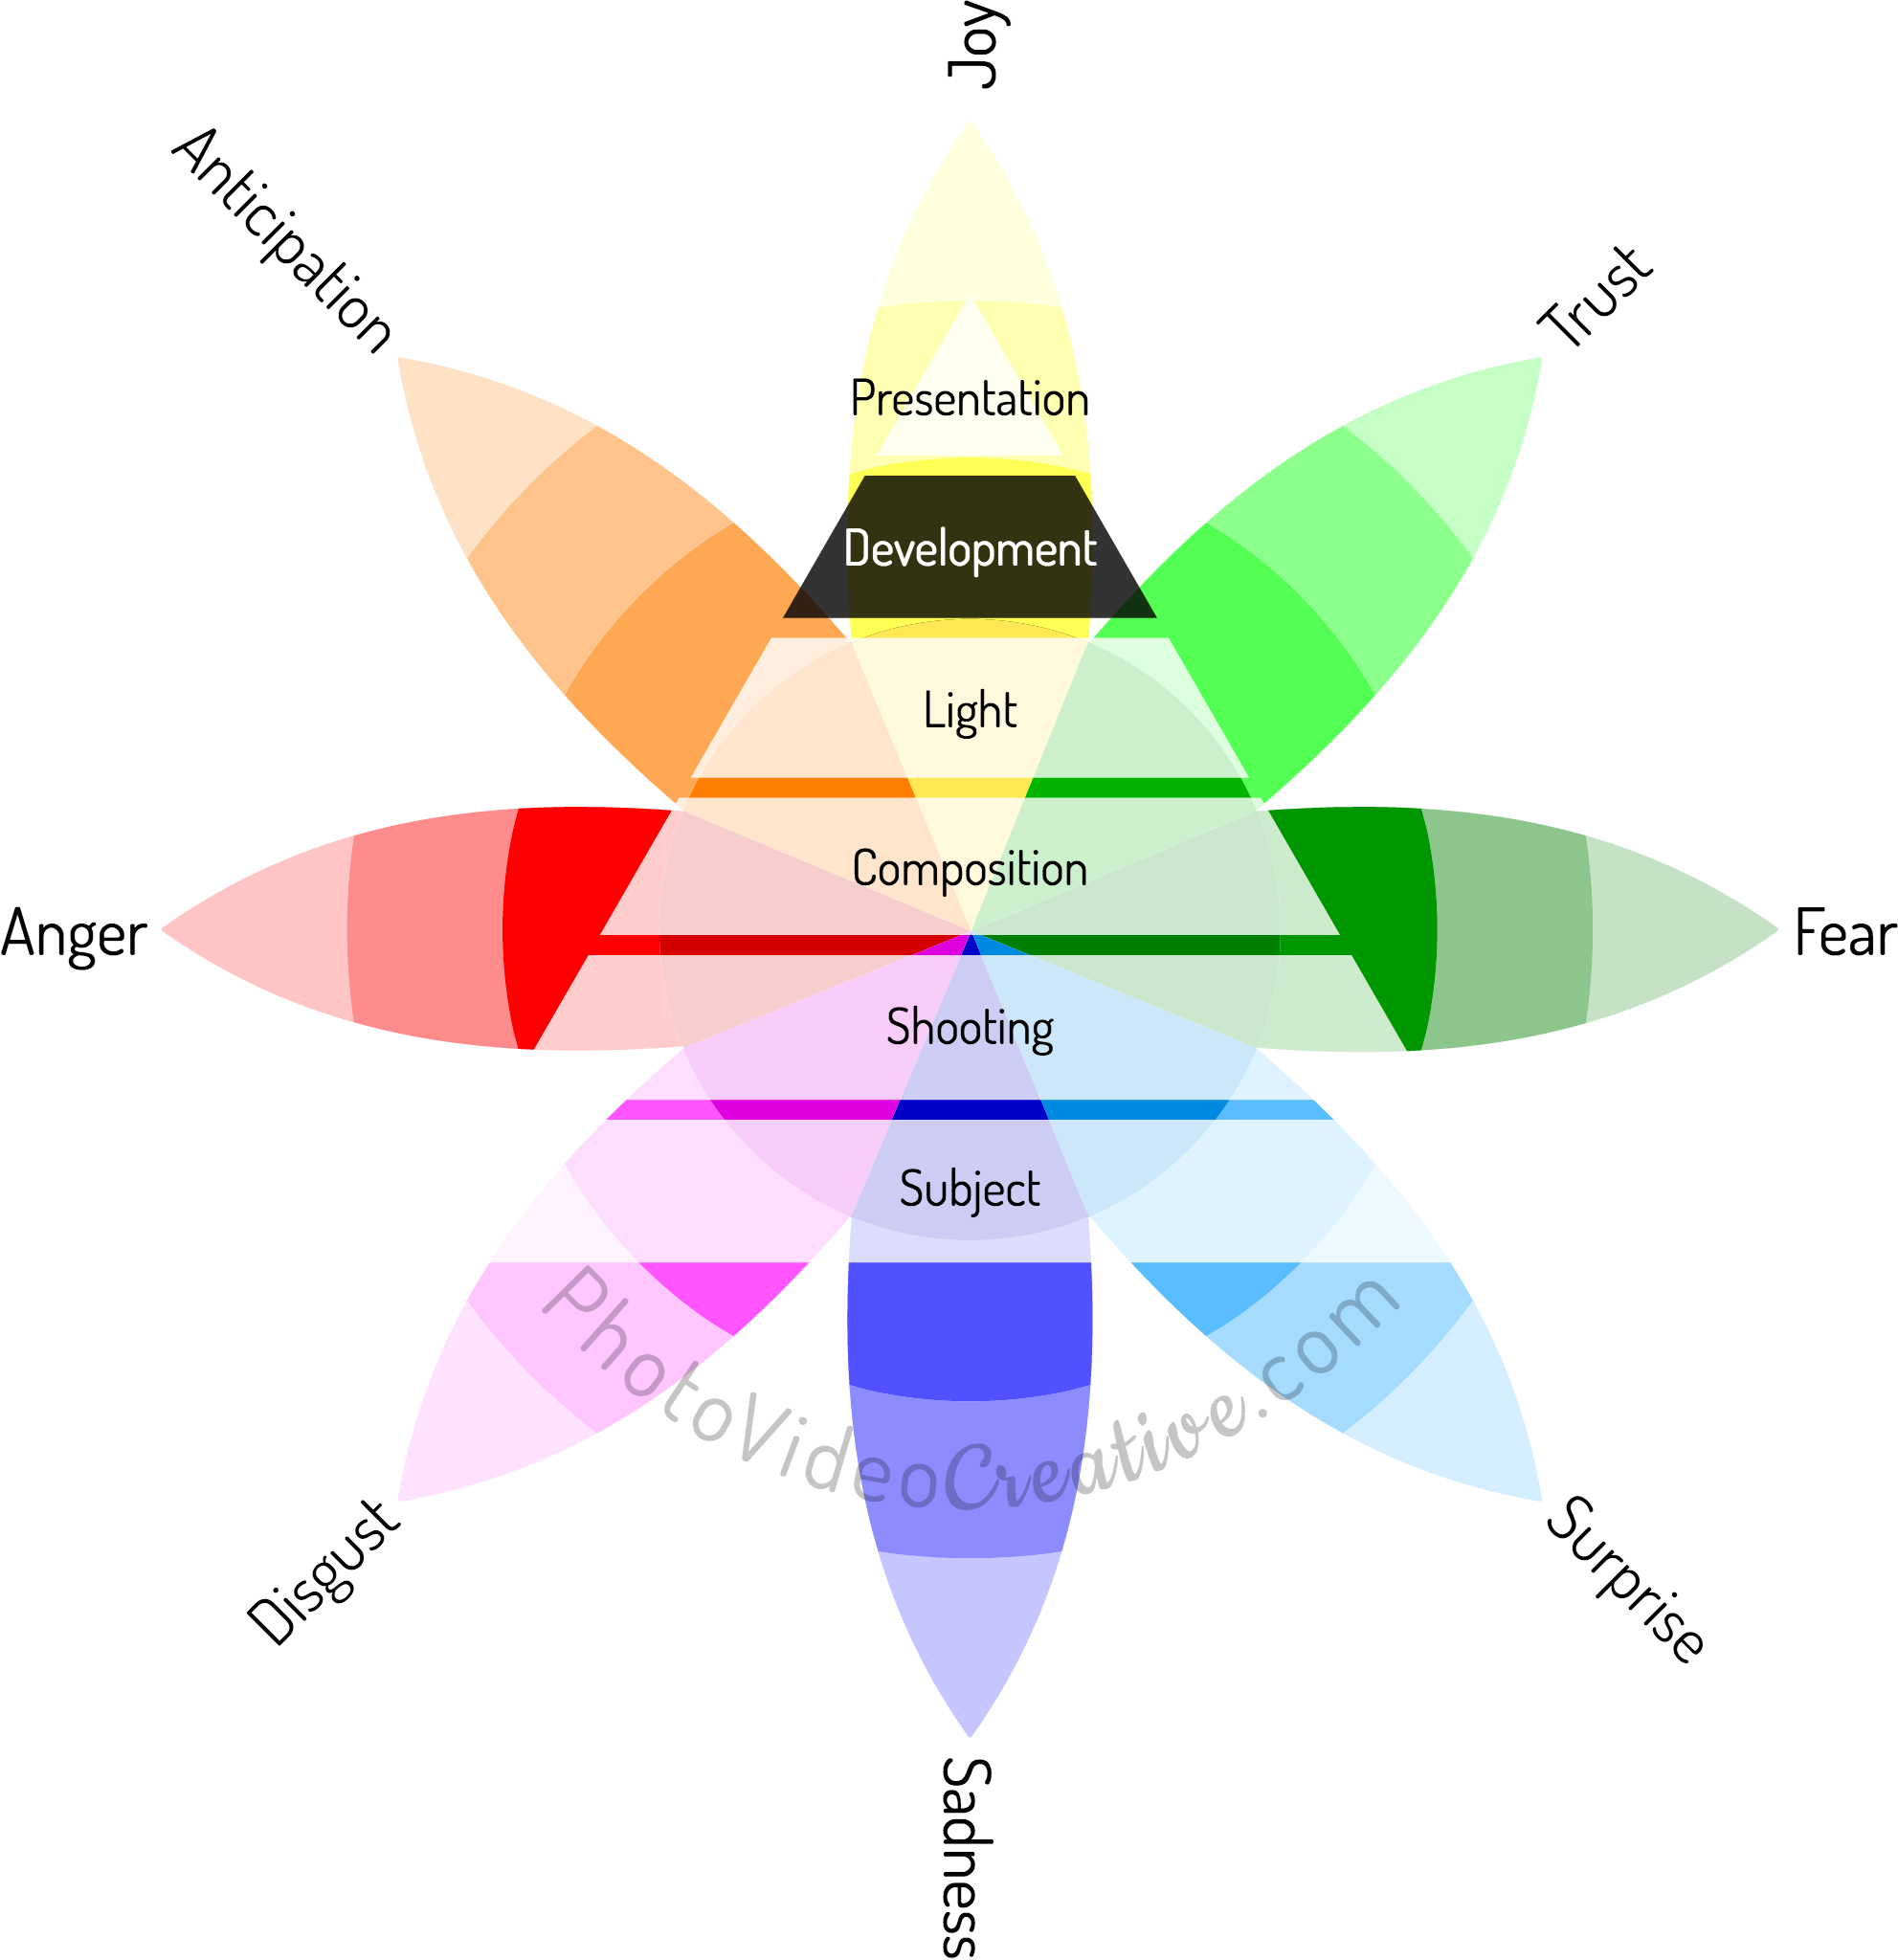
The emotions that you manage to capture and share in your photos are in my eyes the only criterion for making remarkable photos. Focused on the theory of emotions, I designed a 6-step method to learn photography with what you feel first. Development is the 5th step to achieve this, and cropping/reframing is one of the 6 essential development techniques to be known in photography.
The Aspect Ratio: It Is Up to You to Impose Your Limits
The format of a photo could be more or less lengthened according to the manufacturers and the size of the cameras:
- The Leica brand has popularized the standard format 24x36mm with the 3:2 aspect ratio
- The Rollei brand has popularized the Rolleiflex with their 6x6cm square film with the 1:1 aspect ratio
- The view cameras have often adopted the 5:4 aspect ratio
- Smartphones, digital compact and bridge cameras have adopted a 4:3 aspect ratio
- Digital SLRs have remained with the standard 3:2 aspect ratio
Quantities of other formats with more exotic aspect ratios have also existed, such as the panoramic format of the Hasselblad XPan with the 1:3 aspect ratio for example.
Often, these aspect ratios have been created and perpetuated for practical or historical reasons that have little artistic explanation. This is not the case with classical painting where the format of the canvases obeys the principles of secular harmony, like the French canvas formats:
- The Marine format in painting has a ratio derived from the golden ratio, ie 1:1.618
- The Landscape painting format has a so-called “harmony gate” aspect ratio equal to the square root of 2, ie 1:1.41 (the aspect ratio of A4, A3, etc. paper sheets)
- The Figure painting format has an aspect ratio drawn by a double golden rectangle, that is a 5:4 aspect ratio (this is the format of the view cameras)
But why choose a specific aspect ratio over another for your photo? Read the following!
A Quick Reminder About The Theory of Emotions
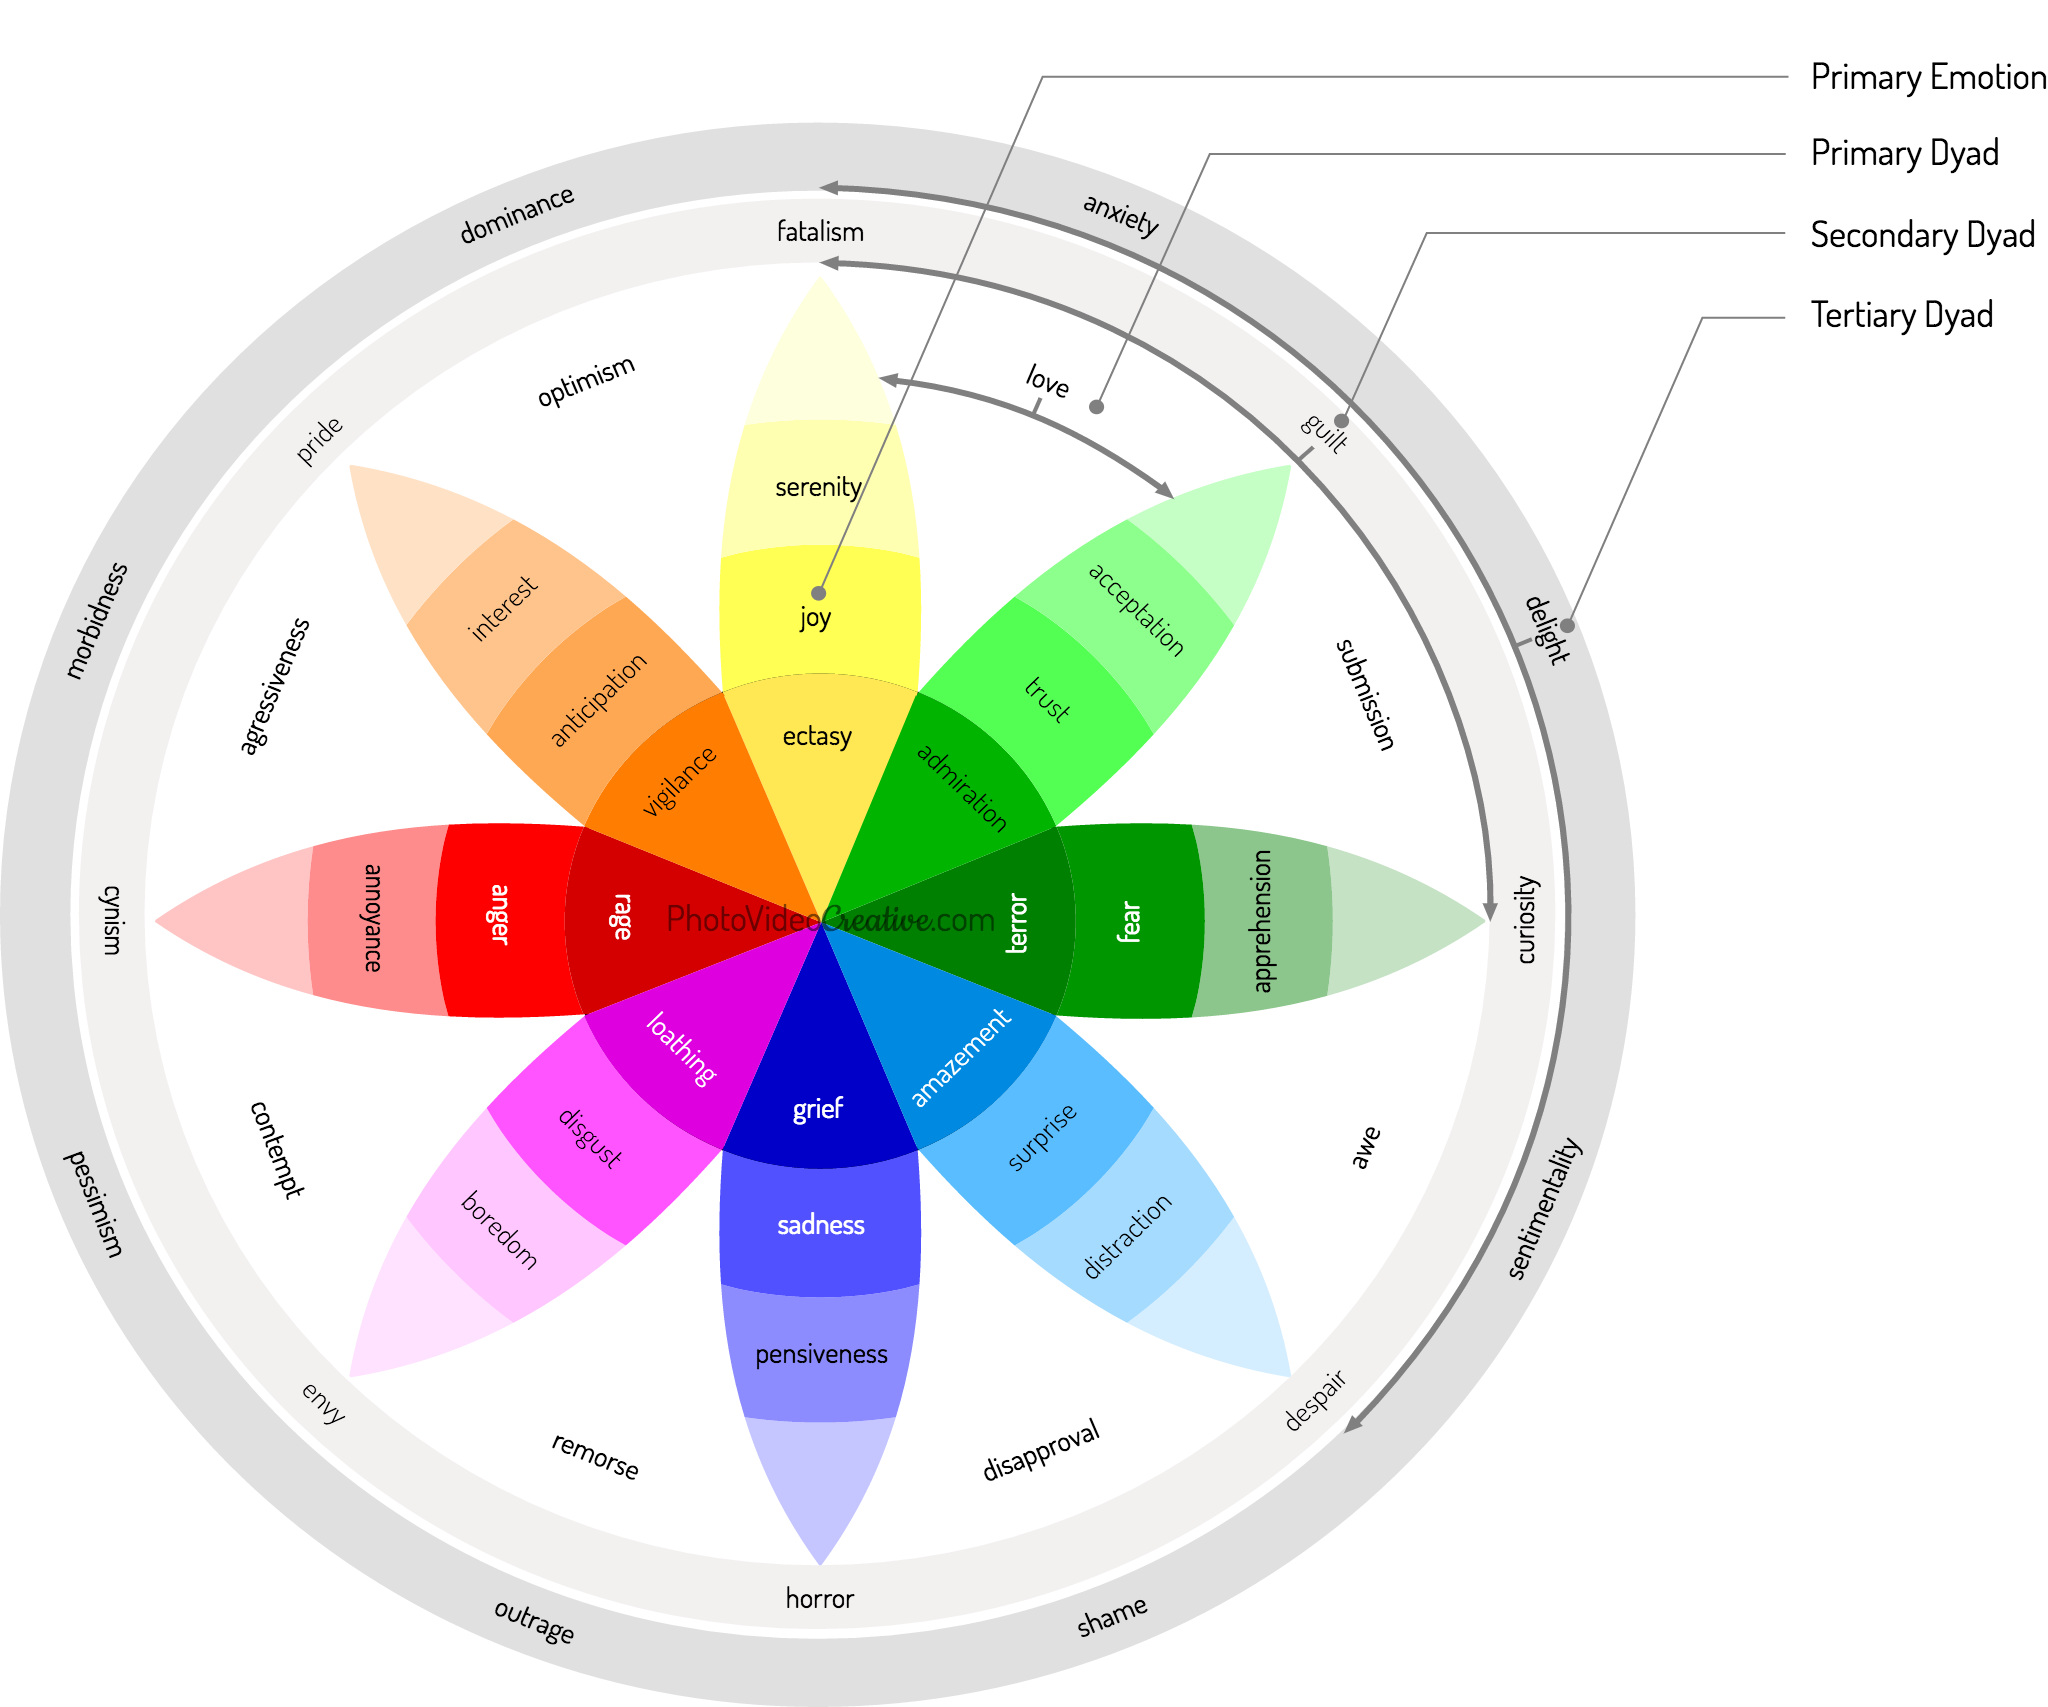
All types of emotions that we feel can be represented on a wheel with 8 primary emotions according to the theory of emotions of Plutchik. These primary emotions come in varying intensities (the most intense are at the center) and combine in 24 other emotions through dyads.
Why Reframe A Photo to Express Your Emotions?
As you read right before, your camera and its sensor impose the aspect ratio of your photo. On a smartphone, a compact or a bridge you will have the 4:3 format, on a DSLR you will have the 3:2 format. Even if you care for your composition with the best techniques like the rule of thirds, your composition may still lack impact.
Indeed, the edges of the image play a primordial role for highlighting the subject of your photo. The way your subject occupies space in your image makes that if some edges of the image are too far away from it, you dilute the emotions you feel about your subject. So a picture with:
- A square 1:1 aspect ratio puts an equal horizontal and vertical tension around your subject
- A 5:4 aspect ratio puts a slight vertical tension on your subject for a portrait-oriented photo, while keeping a harmonious composition drawn from the golden ratio (respectively a horizontal tension for a landscape-oriented photo)
- A panoramic aspect ratio (16:9, 1:3, etc.) puts a large horizontal tension on your subject for a landscape-oriented photo (or vertical tension for a portrait-oriented photo)
Cropping a photo is about to intensify your emotions, by putting in tension the edges and corners of the image against your subject and your composition. As Putchik’s theory of emotions shows, intensifying emotions is moving towards the primary emotions at the heart of the wheel.
Therefore, do not be the slave of the native aspect ratio of your camera.
Again, this native ratio is purely arbitrary from the manufacturers, it cannot accommodate all the subjects you want to photograph. So, always ask yourself at the time of the development of your photo: is the framing out of the camera really the one that best transmits your emotions?
In the examples that follow, and in my portfolio of prints that I have exhibited and sold, you will see that my photos are constantly playing on different aspect ratios.
4 Examples of Cropping and Their Effects on Emotions
All the examples below were taken with a DSLR camera with a 3:2 aspect ratio. All the croppings done will show you the same result: they reinforce the emotions that were otherwise diluted in the original format.
1. Cropping With a Square 1:1 Aspect Ratio
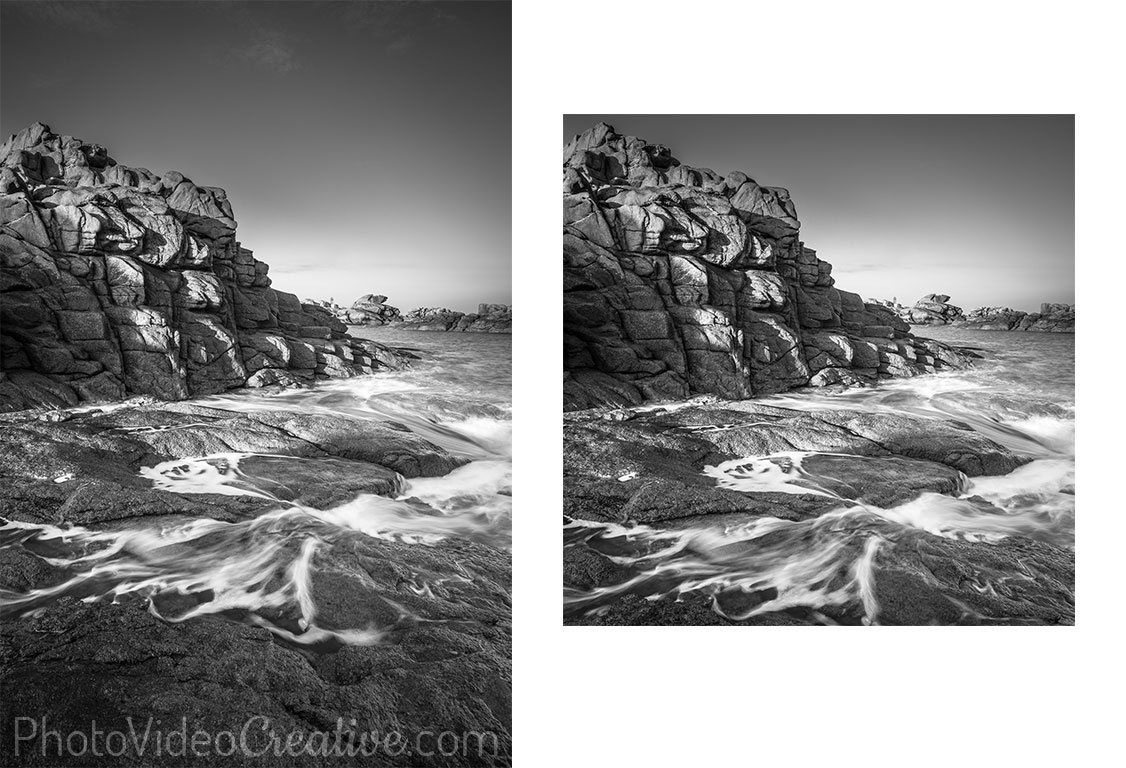
I took this picture on the pink granite coast of Ploumanac’h in Brittany. For a month of November, the weather was exceptionally mild with a strangely calm sea and a blue sky almost cloudless. What struck me in this scene is the pattern of the rocks highlighted by the grazing light of the morning and the waves leaving their filaments white with foam. My emotions on the spot were mainly a form of delight (joy / serenity + surprise) and curiosity (admiration + surprise).
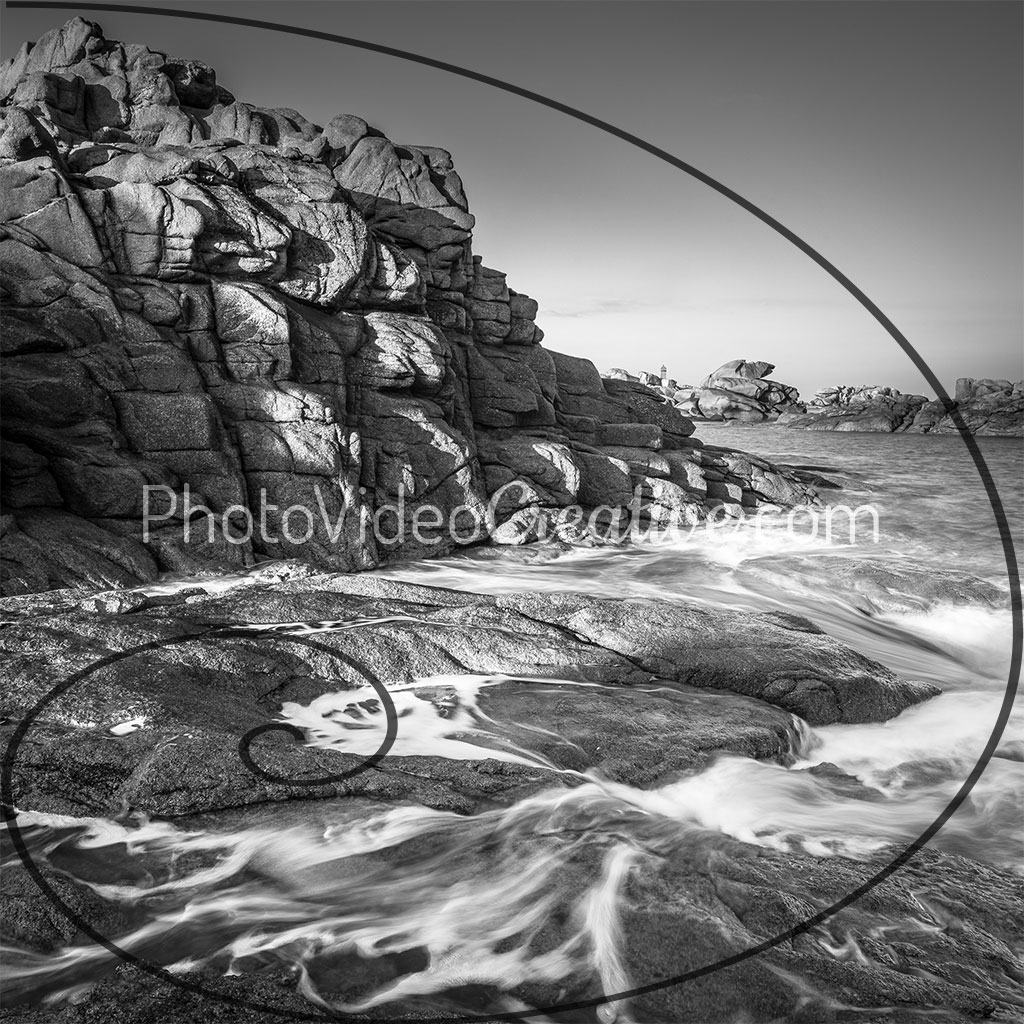
During the development of this photo, I found that the bottom and top parts of the photo created voids that diluted the singularity of the textures of the rocks and the foam. After trying a 5:4 aspect ratio cropping, I found that the 1:1 aspect ratio gave the most strength to my composition and therefore to the emotions I wanted to convey. After cropping, the lower edge of the image highlights the wave that slides over the rocks, and the upper edge allows a descending diagonal to appear along the crest. When the golden spiral is superimposed on the photo, one can realized that the square format allows the observer to look through the crests of the rocks and then the foam of the wave.
2. Cropping With a 5:4 Aspect Ratio
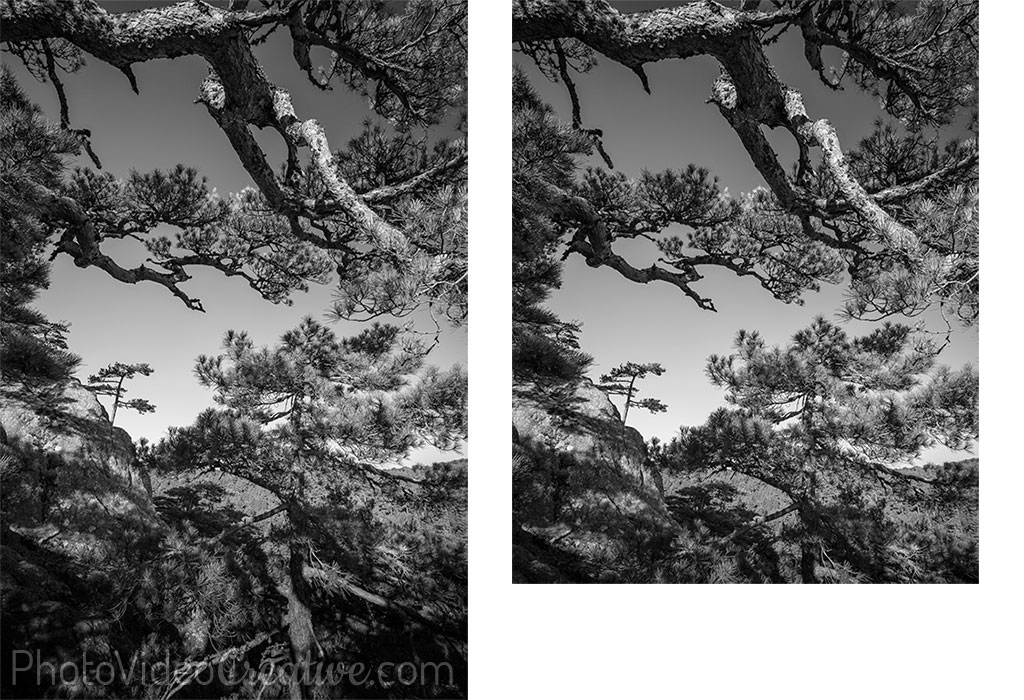
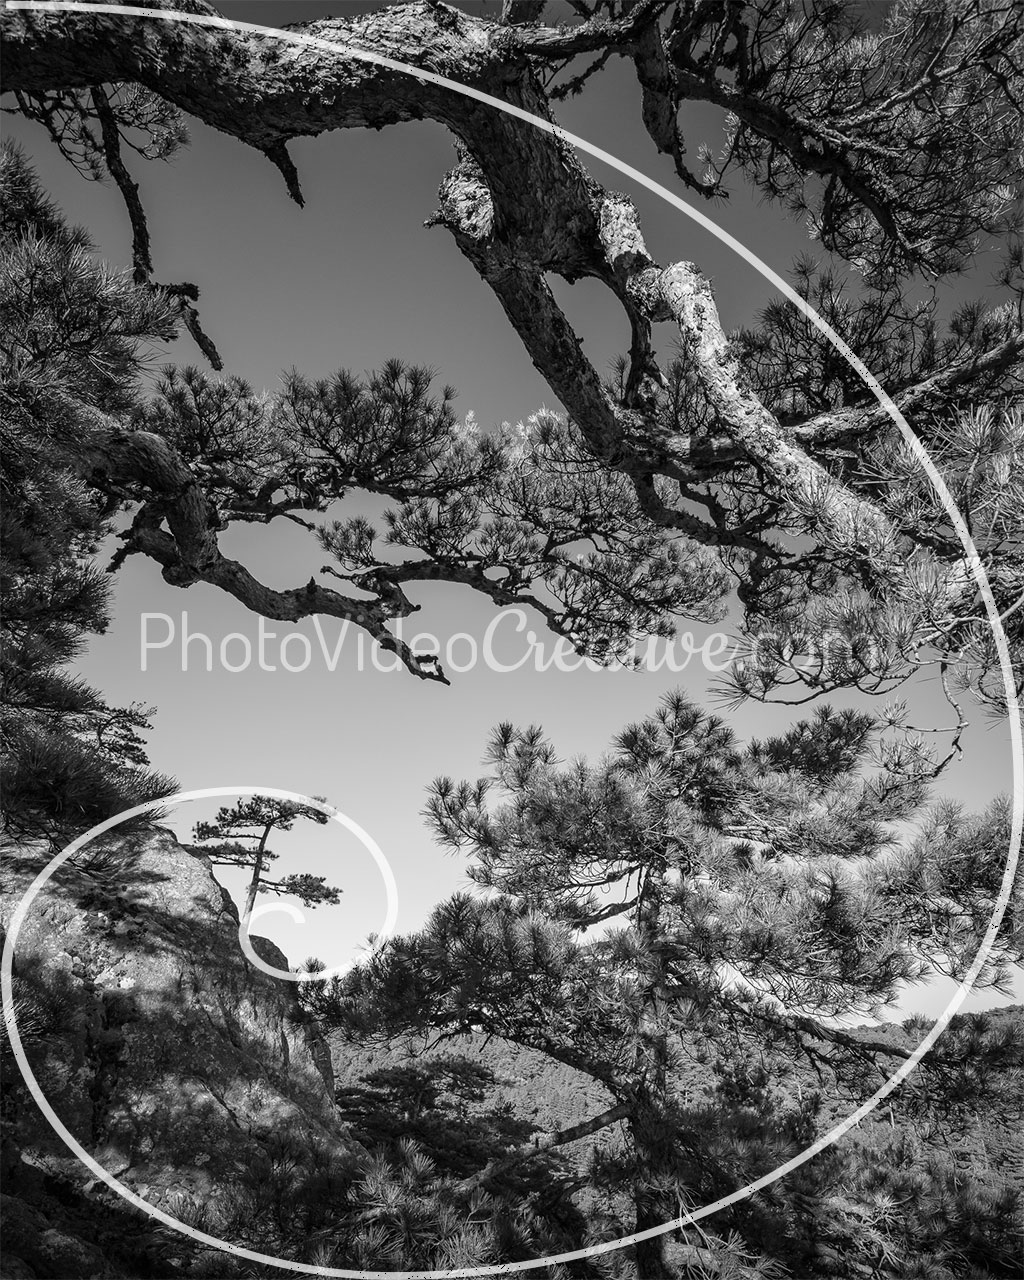
I took this picture near the “Bomb hole” next to the famous Bavella’s Needles in Corsica. I was seized by the tortuous forms of the branches of laricio pines which cover the flanks of these mountains. I found a composition where I could show these branches while having a visual focus point: a young pine whose silhouette was detached againt a cloudless sky. For me, the picture of this scene captured my emotions of curiosity (admiration + surprise) and delight (joy / serenity + surprise).
The 3:2 format gives too much room to the lower part which is visually confused and devalues the young pine as the focus point. So, I applied a crop with a 5:4 aspect ratio that continues to give a vertical tension to the image while enhancing the value of the young pine. With the golden spiral surimposed, one can confirm that my composition allows the observer to go through the whole image starting with the upper branch up to the young pine.
3. Cropping With a horizontal Panoramic Aspect Ratio
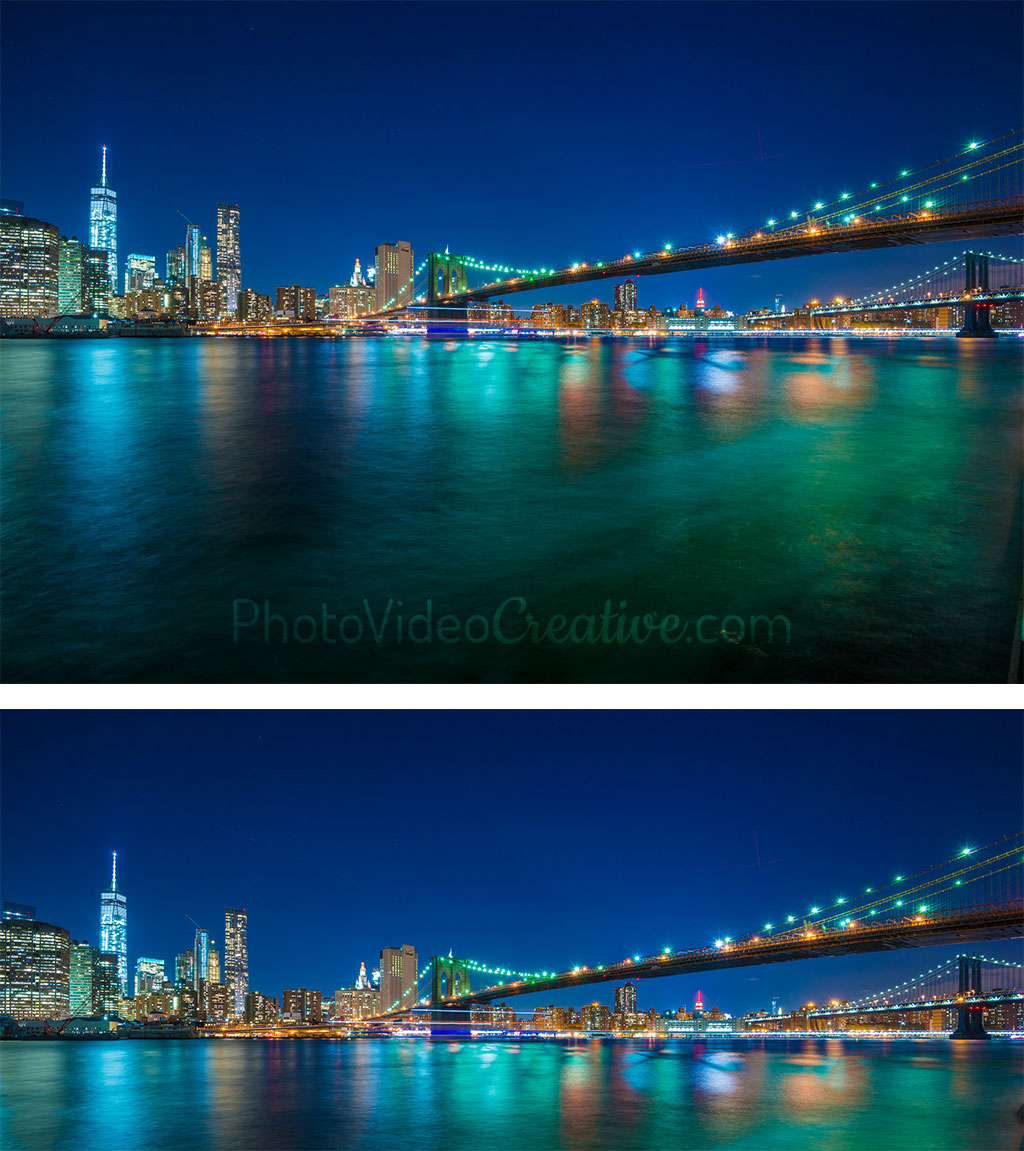
This photo of New York shows Manhattan seen from Brooklyn. Even if this skyline is ultra-famous, to see it for real still remains very pleasing. I took the shot at the time of the blue hour, after sunset. The artificial lights are thus well emphasized against the deep blue color of the sky. In front of these colored spots throughout my field of vision, I was feeling emotions of delight (joy + surprise).
Even before the shot, I knew I wanted a panoramic crop. The ratio I use is a 1:2.316, which is an atypical aspect ratio. I print my panoramic photos so that they can be placed under a stock 100×50 cm frame with a mat of constant width both in height and length. And it turns out that the photos that fit in this format have an aspect ratio of 1: 2.316.
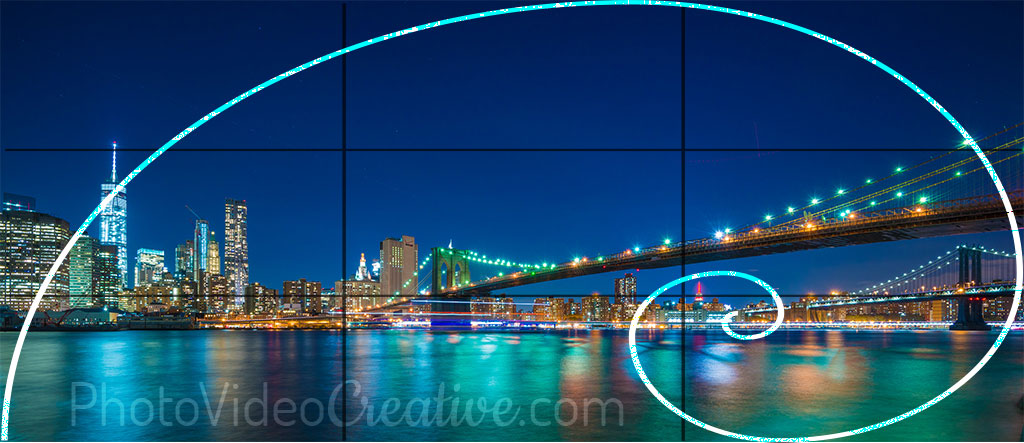
I have carried out a reframing based very conventionally on the rule of thirds: one third for the water, one third for the buildings and bridges, one third for the sky. The panoramic format creates a pressure on the lower and upper edges that forces the viewer’s eye to scan the image laterally.
This panoramic crop also emphasizes various visual highlights, in each third of the image:
- In the left third: the white arrow of the One World Tower
- In the central third: the pillars of the Brooklyn Bridge
- In the right third: the red arrow of the Empire State Building and the pillars of the Manhattan Bridge
4. Cropping With a Vertical Panoramic Aspect Ratio
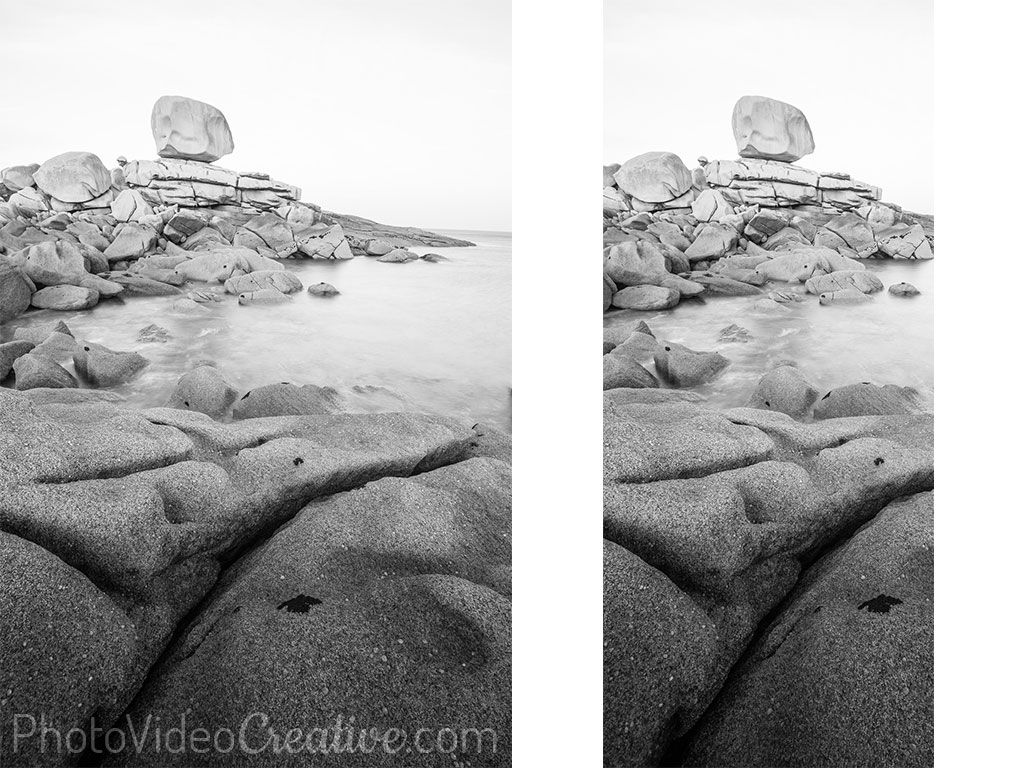
I took this picture on the pink granite coast at Trégastel in Brittany, where the “Dice” is the local rocky attraction. The morning particularly quiet and bright during this shot contrasted surprisingly with the fact that we were in the middle of November. It is therefore in a state of fairly marked serenity that I captured the “Dice”.
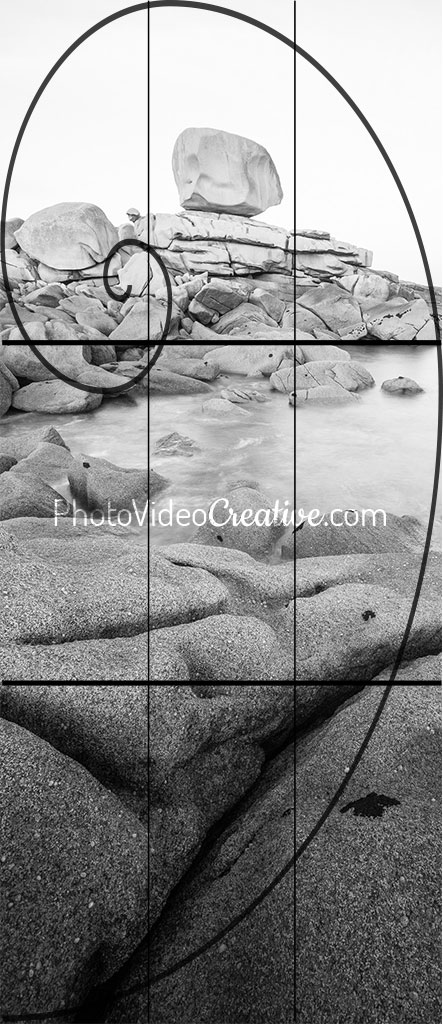
The original aspect ratio appeared to me very quickly insufficient to highlight the singularity of this rock which is like laid on the coast by some giants. So I opted for the panoramic vertical format. This format applies pressure on both sides of the image immediately causing it to sweep top to bottom with the eyes. In addition, I chose to center the “Dice” which was the most rewarding composition. Thus, a composition with the golden spiral is not really applicable here. Even if the fault starting at the bottom marks the beginning of the spiral, the “Dice” would not have been in the spiral eye, even if I had shifted the crop on the right of the picture.
What Do You Think?
Did you think cropping your photos was spoiling them? Do you better understand the interest of always asking yourself about the right aspect ratio of your framing? What aspect ratio do you want to experience immediately?
Leave me your comment, I will answer with pleasure.
Let’s Go On Together!
Learn how to photograph with my 6-step method to get your photos first with emotions: a powerful and intuitive way to make feelingful images without the burden of tools and techniques.
Then understand why development in photography is essential in the expression of your emotions and explore the different development techniques:
- The development by Cropping (this post)
- The development of Tonality
- The development of Color
- The development of Contrast
- The development of Geometry
- The development of Pixel Rendering (soon)
Do not miss my future posts to better capture and share your emotions in picture: subscribe to my newsletter and get my free eBook!
Do you like what you’ve learned? Share this article with your relatives!
Comments