
The composition of your photo is not only based on the content with your subject and its environment. After shooting, you can continue to support your composition with visual anchor points in your photo thanks to their brightness. It is the development of local tones, which is a technique often called dodging and burning.
I will share with you:
- A reminder of what is the tonality and composition of a photo
- A reminder about the theory of emotions
- How emotions are related to local tones and composition
- Vignette, a special case of local tone
- How to apply local tones or vignetting in your photo
Before We Begin
Succeeding in making remarkable photos means provoking emotions as close as possible as those you felt during shooting. Focused on the theory of emotions, I propose a 6-step method for learning photography first with what you feel. Development is the 5th step to achieve. Among the 6 major development techniques to know, there are the techniques for developing the tonality and tones of your photo: the local tones and vignetting are one of them.

A Quick Reminder about Tonality and Composition
Tonality is the overall brightness that emanates from your photo. The tonality can be dark, balanced or bright and each tonality pushes its own emotions.
Composition is about laying out the content of your photo. It means choosing where to stand against your subject and how to place the subject in the frame of the image. The goal is twofold, it is necessary that:
- The eye is hooked by the photo and has an irresistible desire to decipher it,
- The emotions are intensified because being captivated by the form, we become more sensitive to the content that are the subject and your emotions
On this blog, you can know more about the techniques of composition and their effects on emotions.
A Quick Reminder About The Theory of Emotions
All types of emotions that we feel can be represented on a wheel with 8 primary emotions according to the theory of emotions of Plutchik. These primary emotions come in varying intensities (the most intense are at the center) and combine in 24 other emotions through dyads.

Local Tone, Composition and Emotions: Understanding This Trio
Local Tone: What Is It?
As recalled above, the tonality is at first general: it applies to all the photo. This is the global tone. But there is another form of tone when it applies only to certain areas of the image: these are local tones. What are they for?
Our vision is naturally attracted by light: we focus our attention on what is enlightened and neglect what is dark. Remember the theater or the circus: you instinctively look where the spot of light is. Like the director, you can guide the eye in your photo with the lightest areas of the image.
Local Tone And Composition
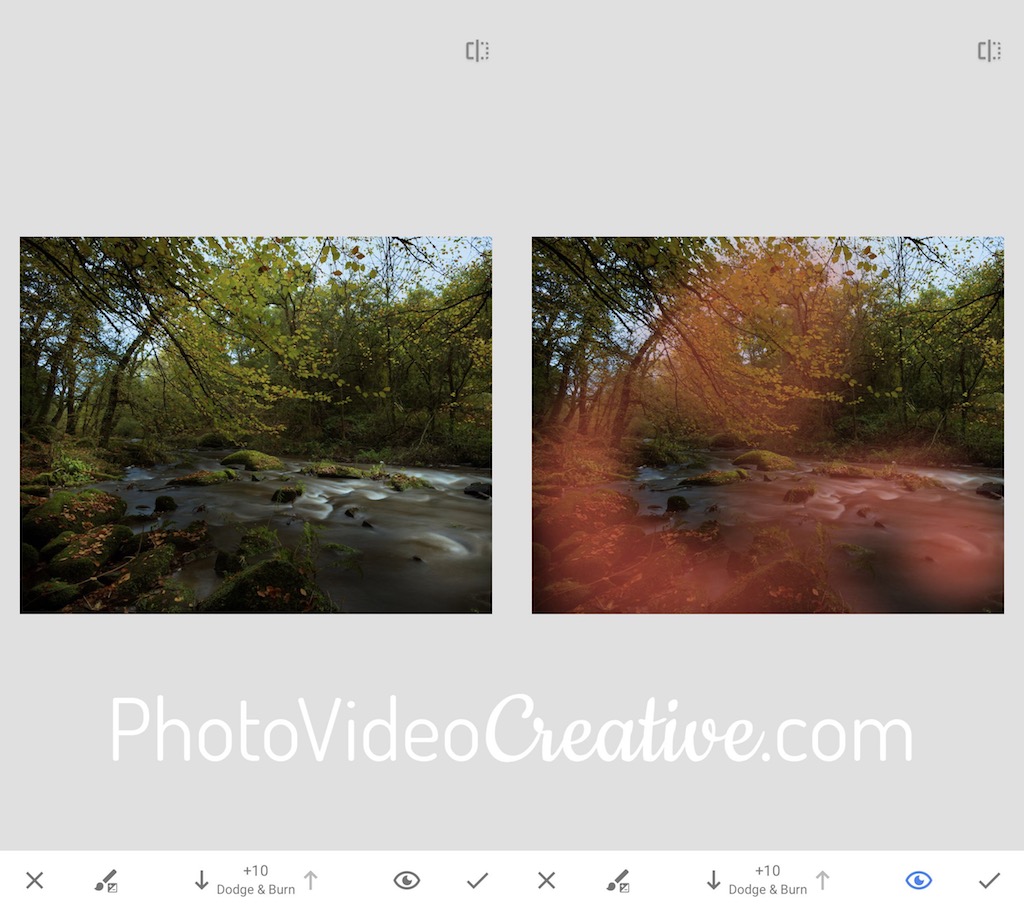
Apply a local tone to your photo is to highlight one or several areas you want to be noticed, and/or darken the ones that should not divert attention. This technique is called dodging and burning.
Seen otherwise, the local tone is a photographic composition tool: it structures the content of your photo to highlight your subject and the emotions it emits.
Emotions Related To Local Tones
By strengthening your composition, you intensify the emotions you want to share. According to the theory of emotions above, it is to emphasize the emotions in the center of the wheel:
- Ecstasy,
- Admiration,
- Terror,
- Amazement,
- Grief,
- Loathing,
- Rage,
- Vigilance.
This is how the local tones serve the composition which in turn serves your emotions.


Vignette: A Special Case Of Local Tone
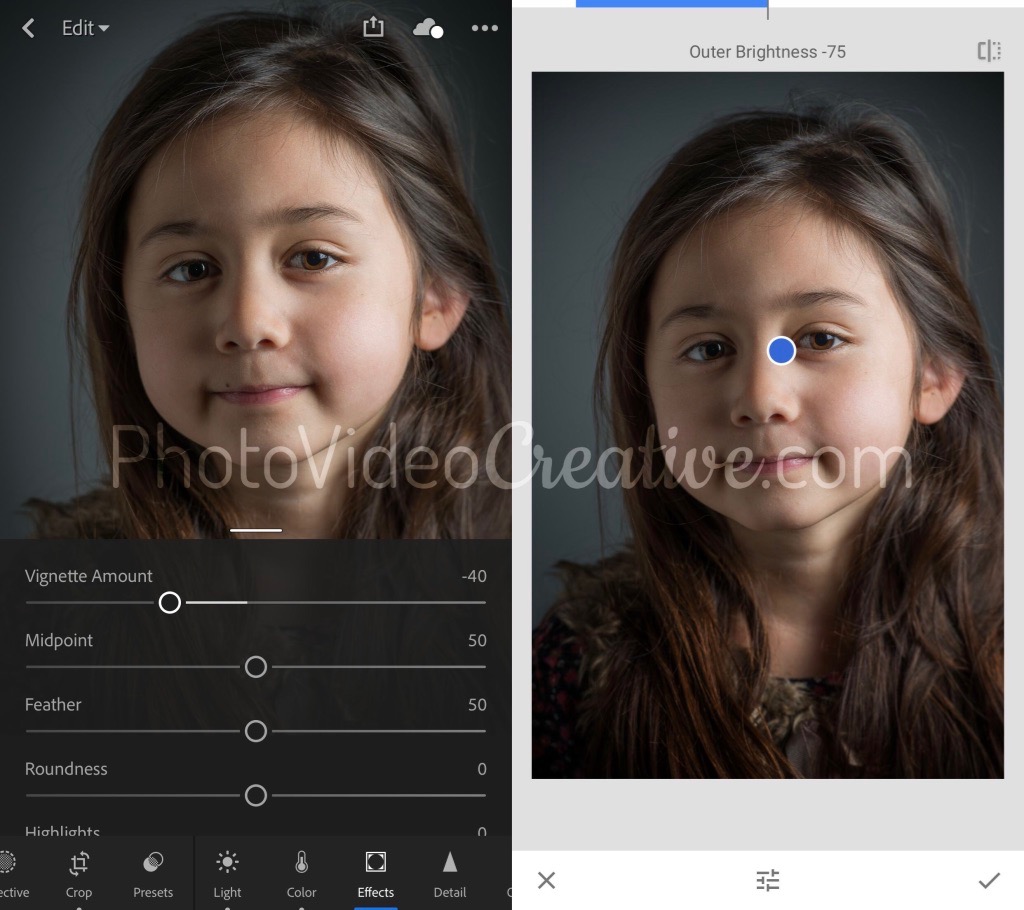
The vignette effect is the darkening of the corners of your photo. In other words, it is a bright tone located on the center of your photo. For optics purists, vignette is considered as a defect on photo lenses. But from a creative point of view, the vignette is a local tone tool and therefore a composition tool.
Choosing to voluntarily apply a vignette is a way to bring out the subject that is at the center of your photo, and therefore the emotions that you have felt in front of him. But be careful, if your subject is not really centered, it is better to apply a local tone that is eccentric but placed on your subject.

How To Apply Local Tones To Your Photo
Many photo development/retouching applications allow you to apply local tones: Adobe Lightroom on mobile or computer, Google Snapseed… to name only the best known.
You then have 3 possible tools to define:
- A free area as if you paint with a brush
- A round or oval area: this is the radial local tone
- An area separated from the rest of the image with a dithered border: this is the gradient filter
Each of these areas may have more or less diffuse outlines to blend with the overall tonality of the photo.
Then, just use the same settings as the ones for global tone to have a dark or light tone for each of the zones you have defined.
Like any development technique, you must both sufficiently push your effect so that it is visible, but does not take over your subject. If anybody first notice the local tones before considering the subject, this is the sign that your development is too exaggerated. And the exaggeration will divert the emotions of your photo and you finally miss the point.
How To Apply Vignetting To Your Photo
Here too, a lot of software and apps offer you a vignetting tool: Adobe Lightroom, Google Snapseed, Instagram, … The list is much more provided, the vignetting is a simplified form of the local tone and thus easy to implement:
- The area is automatically round or oval depending on the aspect ratio of your photo
- The border between the vignetting area and the subject is automatically diffused
Advanced applications like Adobe Lightroom allow you to edit the vignette area even more precisely.
Did you realize that you could enhance the composition of your photo with local tones? Do you know what image do you want to experiment this development? Do the available tools seem complicated to implement? Leave your comment, I will answer with pleasure
Let’s Go On Together!
Learn how to photograph with my 6-step method to make your photos first with your emotions. a powerful and intuitive approach that push back tools and techniques to the background.
Then understand why development in photography is essential in the expression of your emotions and explore the different tonality development techniques:
- The global tone
- The local tone and vignette (this post)
Do not miss my future posts to better capture and share your emotions in picture: subscribe to my newsletter and get a free eBook!
Do you like what you’ve learned? Share this article with your loved ones!