Do not be caught in JPEG format, your smartphone is capable of recording high-quality pixels. But the JPEG format does not know how to take advantage of the richness of these data. There is a file format for raw image data: Adobe Digital Negative or DNG for short.
Key Benefits of DNG Raw Format
The DNG format gives 2 immense advantages to the photographer compared to the JPEG:
- Choosing the white balance with no loss of quality
- Correcting the right exposure with a much higher latitude
How to Enjoy Dng Raw Format on a Smartphone?
There are 2 requirements to switch to the DNG format.
Requirement #1, having a recent smartphone:
- Apple iPhone SE, 6s / 6s Plus, 7/7 Plus,
- Samsung S6, S7, Galaxy Note 5, …
- LG G4, G5, V10, ….
- Sony Xperia Z5, ZX, …
- HTC One M9, …
And the list is far from exhaustive for Android smartphones.
Requirement #2, using an advanced photo application such as Adobe Lightroom Mobile, Camera+ (iOS), and many others.
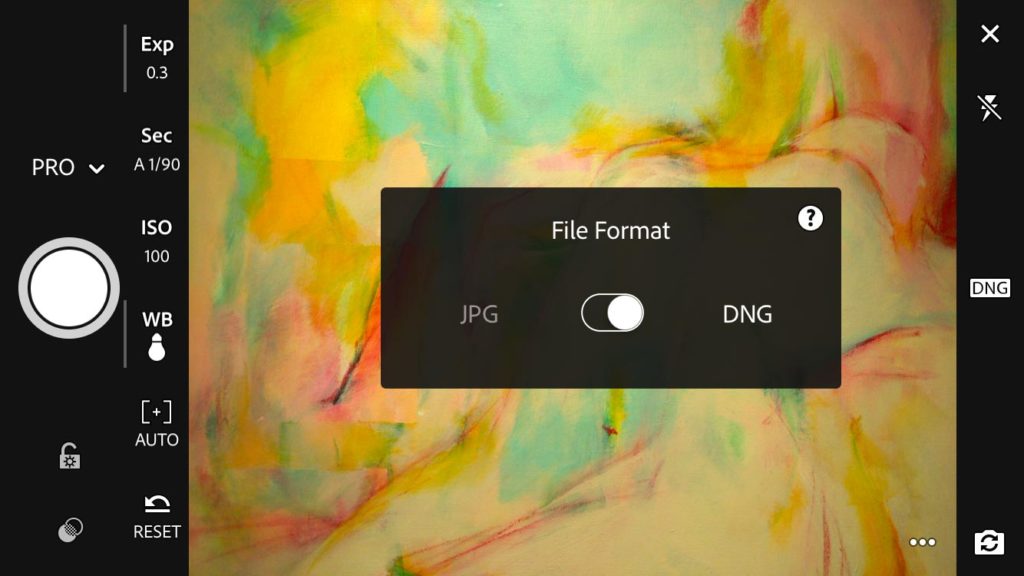
What Specific Results Can We get from DNG Format On A Smartphone?
The pixels are recorded with greater precision (color quantization on 1024, 4096 or even 16384 levels compared to 256 levels of JPEG per primary color), so you can push further the developments in your photos without loss of quality, especially in gradient tones.
Another benefit is the digital noise processing in an application like Adobe Lightroom Mobile gives a more photo look. Thanks to its more advanced algorithms (but which are also more power-hungry) applied to the raw photo data, the skin or the hair do not have pastel effect for example.


But be careful, the quality of the DNG is paid in storage space. A DNG file takes 3 to 4 times the size of a JPEG file. Count 13 to 15 MB per DNG file for a smartphone at 12 Mpix (Apple iPhone SE sensor, 6s, 7), while a JPEG file will be satisfied with 3 to 4 MB for an equivalent resolution.
In addition, you must be comfortable with the development of DNG photo files to exploit the full potential of the raw pixels recorded. You will soon find a tutorial on PhotoVideoCreative.com about using DNG photos with Adobe Lightroom Mobile: subscribe to my newsletter and get a free eBook!
Was this article helpful to you? Leave me your comment, I will answer with pleasure.