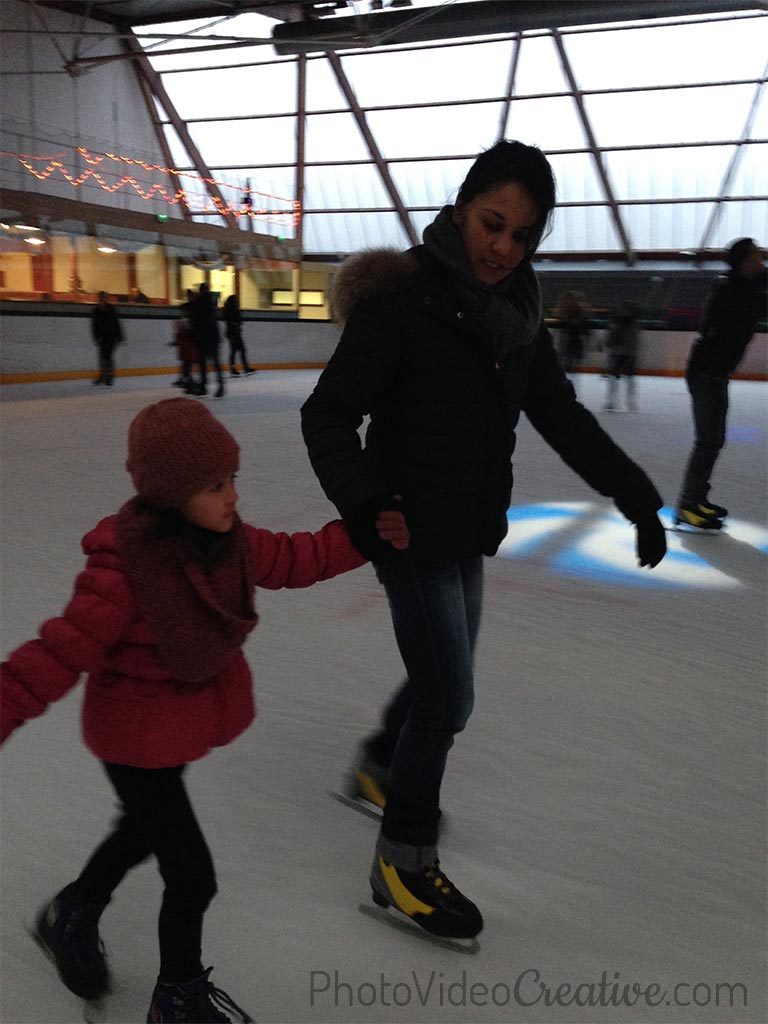
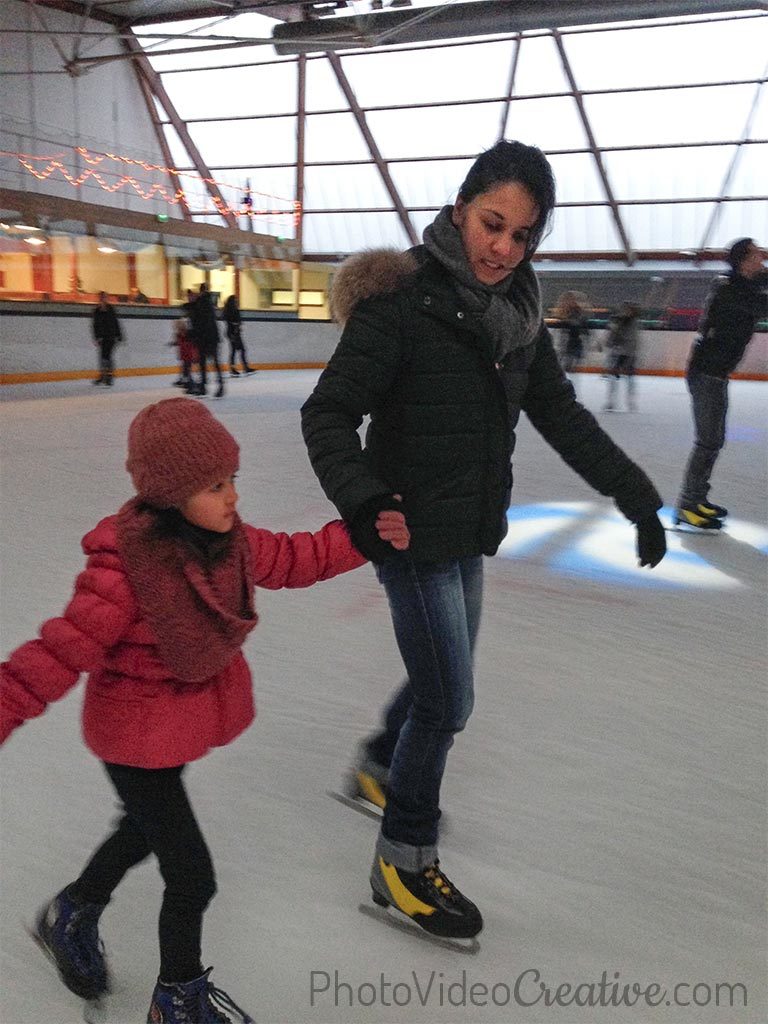
A too dark photo is an underexposed picture. The smartphone did not understand what was the main subject of the photo. By trying to compromise on the exposure it thought was correct, the smartphone was wrong!
Why Can A Smartphone Make UnderExposed photos?
When a scene is very contrasted (very bright and very dark at the same time), your smartphone is facing a dilemma. With its limited dynamic range, a smartphone will have to choose between having over-exposed white areas or underexposed dark areas. If the dark areas represent only small portions of the image, the smartphone will favor the exposure of the largest area which are bright. By doing so, the smartphone is possibly underexposing the photo, if it did not understand that the dark areas are actually the subject.
As for white balance, there are at least 3 methods to manage this issue:
- A quick method of correction after shooting,
- A slower method by setting exposure just before triggering,
- A method of correction after shooting even more effective: dropping the JPEG format.
CORRECT EXPOSURE AFTER SHOOTING
This method relies on the exposure adjustment in photo applications, even found in the stock app. This works well if corrections are limited. But if the picture is very underexposed, the correction will give the same problems as when you make pictures in low light: a noisy image that will be grainy with color dots.
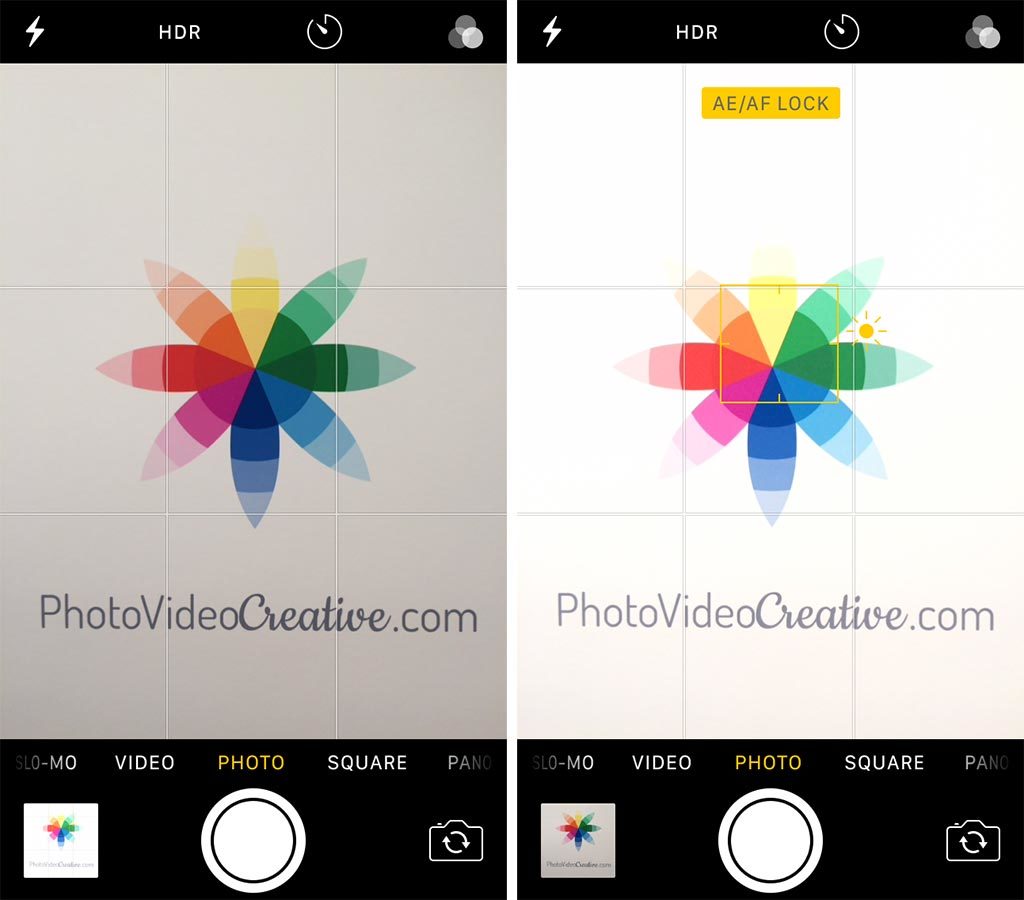
Adjust EXPOSure MANUALLY BEFORE SHOOTING
With the default photo application, just press and hold the area that needs to be well exposed and play with the cursor to compensate for auto exposure.
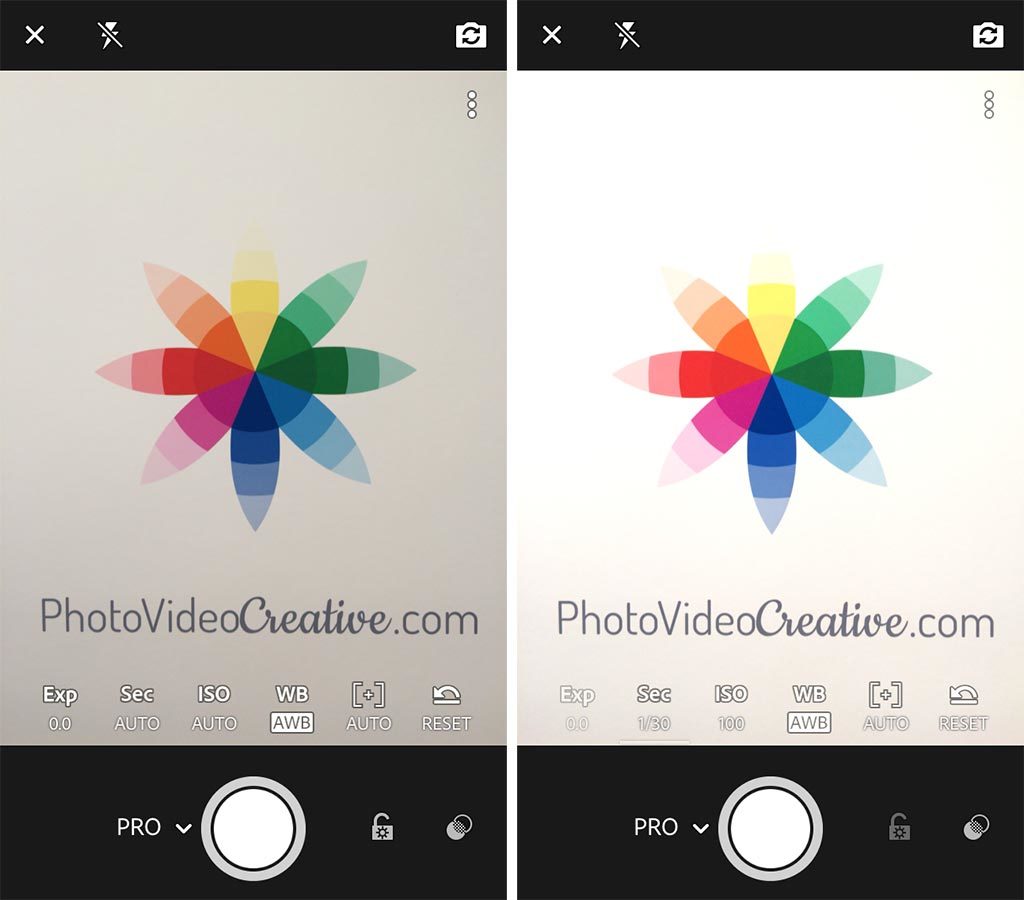
With an advanced photo application like Adobe Lightroom Mobile, you have access to 2 manual settings for the exposure:
- Exposure duration in fractions of seconds
- ISO sensitivity
On smartphones, there is no diaphragm modulating the amount of incoming light. The aperture is fixed: f/1.8 for the best ones, often between f/2.2 to f/2.8. You can not play with this setting for exposure.
To correct an excessively dark exposure, first increase the exposure duration (be careful with fractions: a 1/10s is longer than 1/30s for example!). If you take hand held photos, I advise you to not be longer than at 1/30s to avoid camera shake and blurry photos. If you have an optical stabilizer in your smartphone lens (like on the iPhone 6 Plus or the iPhone 7), you can afford to go as long as 1/10s! If the smartphone is standing still like on a tripod for example, you can go to extreme durations.
If the exposure is still too dark, increase the ISO sensitivity. But be careful not to make the image too noisy.
CORRECT EXPOSURE AFTER SHOOTING WITH MORE LATITUDE
There is a final method that is both simple and less restrictive on the ability to correct exposure: taking pictures in raw DNG format. But it is reserved for the latest smartphones. I explain to you what is the DNG format, why and how to use it in my post “Why the Raw DNG Format Gives Better Smartphone Photos than JPEG”.
Was this article helpful to you? Leave me your comment, I will answer with pleasure.