A photo with neutral colors is a photo where the white or the gray have no color cast. To obtain such a picture, the smartphone must determine what is white or gray according to the ambient light: this process is the white balance.
Why Can a Smartphone Set a Wrong White Balance?
No light is white. For example: if you perceive that the sunlight is white, and at the same time you see an artificial light coming from a filament bulb, then the light of the bulb will appear yellow / orange to you. Conversely, if you perceive the artificial light of the bulb as white, and at the same time you see the daylight , then the daylight will appear blue to you. Depending on the ambient light, your brain automatically operates its white balance.
By default, the photo application of the smartphone does not allow to choose the white balance (also called the color temperature). There is only automatic mode: the smartphone tries to guess what must be white.
Most of the time the result is correct or passable. But there are also cases where the white balance is completely off: the picture is too blue or too orange.
There are 3 methods to manage white balance:
- A quick method with correction after shooting
- A slower method but more qualitative method by adjusting the white balance before triggering
- Another quick method with correction after shooting and without loss of quality by dropping the JPEG format.
Correct White Balance After Shooting
This is the easiest method: let the smartphone guess the right white balance and correct after shooting. And it is often the only possible method if we have to shoot immediately and not miss the occasion.
The correction is then very simple, we choose to give a bluer white balance if the image is too orange (cool a “too warm” color temperature) and conversely more orange if the image is too blue (warm a “too cold” color temperature).
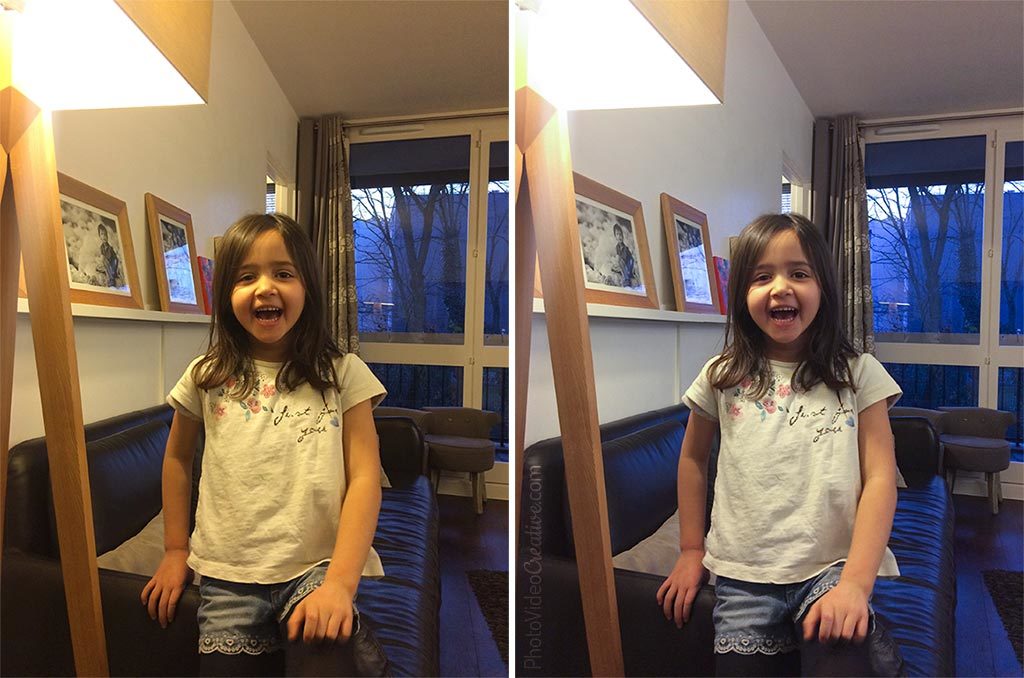
This method is quite acceptable if the smartphone has not been much mistaken. Fortunately, this is the majority of cases. But in extreme cases, the correction to be made is such that it generates severe defects in gradient tones or color accuracy.
If the quality of your images is really important, the best method is not much more complicated. It just needs some anticipation.
ADJUST THE WHITE BALANCE BEFORE SHOOTING
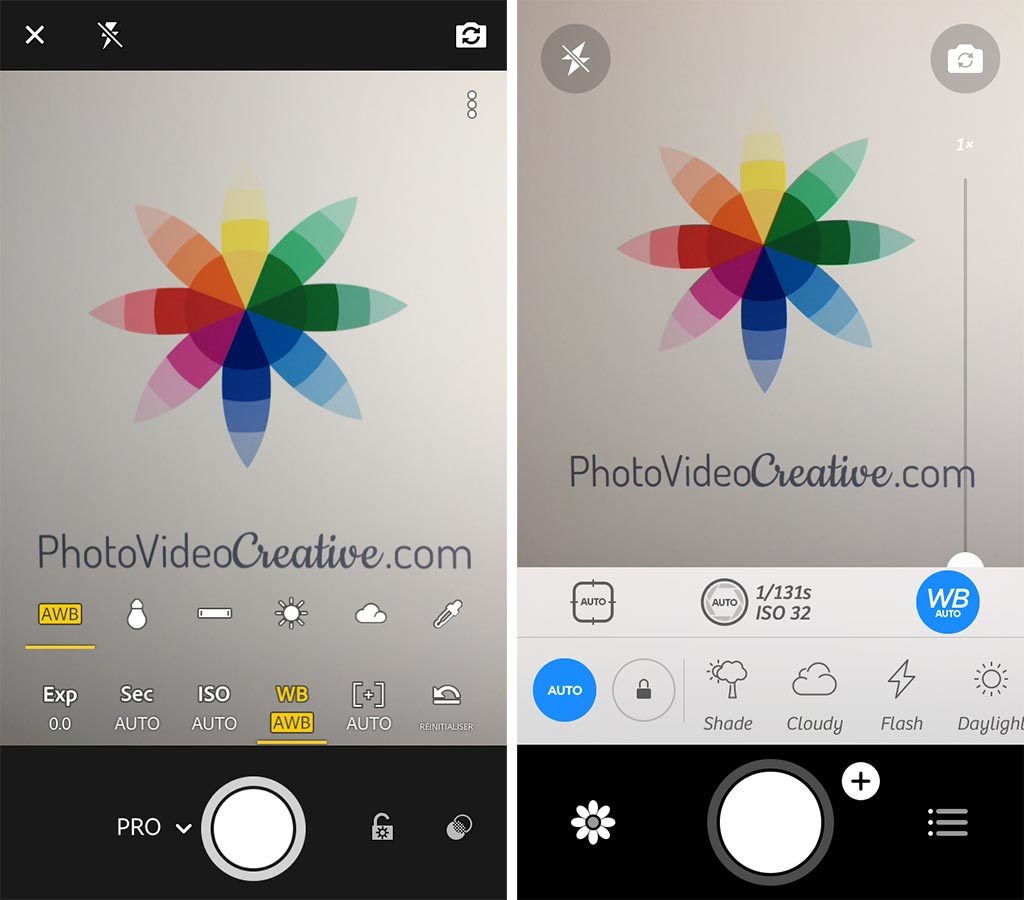
The default photo applications do not allow you to adjust the white balance. You need to use a more advanced photo application such as Adobe Lightroom Mobile or Camera+ (iOS) for example.
The simplest method is to choose a preset closest to your situation. If the main lighting is:
- Daylight in full sun: take the SUN preset (5000 Kelvin)
- Daylight by overcast sky: take the CLOUDY preset (6500 Kelvin)
- Daylight coming from the sky and in the shade: take the SHADOW preset (9500 Kelvin)
- An artificial light from a tungsten, halogen, LED or fluo bulb: take the LIGHT BULB preset (2700 Kelvin)
- An artificial light from a fluorescent tube: take the TUBE preset (3000 Kelvin with magenta tint)
If the preset white balance still looks perfectible, do not worry much. This method already guarantees good quality as the correction to be done after shooting will remain minimal.
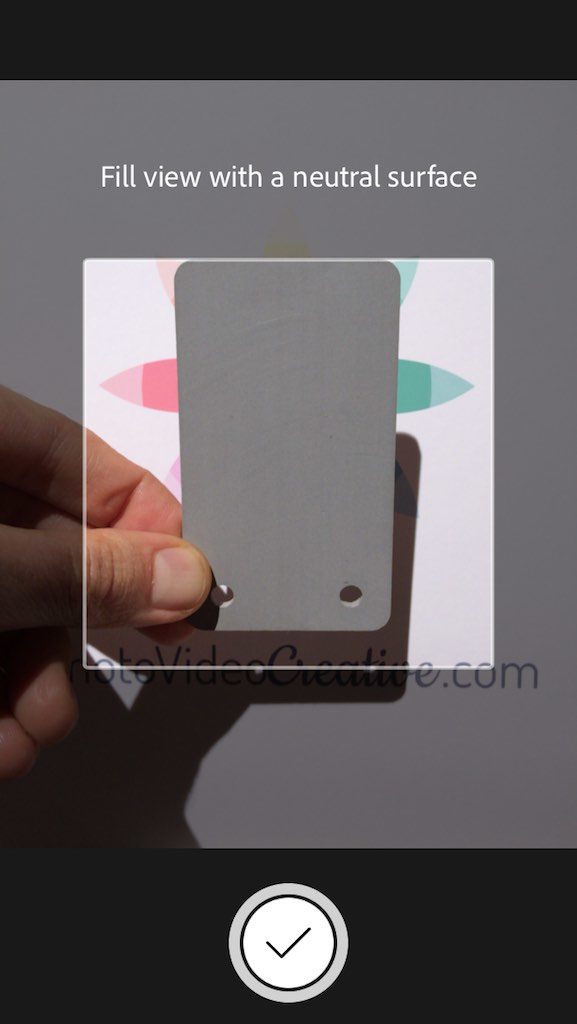
There is another method more accurate but also more tedious: targeting a white or gray area. But you must wear a neutral gray card or a sheet of white paper folded in four. Then select the custom white balance and aim your gray card or white sheet. The result will be perfect.
CORRECT WHITE BALANCE AFTER SHOOTING with no quality loss
There is a last method that is both the simplest and with no compromise on quality: taking pictures in DNG raw format. But it is reserved for the latest smartphones. I explain what the DNG format is, why and how to use it in my post “Why the Raw DNG Format Gives Better Smartphone Photos than JPEG”.
Was this article helpful to you? Leave me your comment, I will answer with pleasure.