
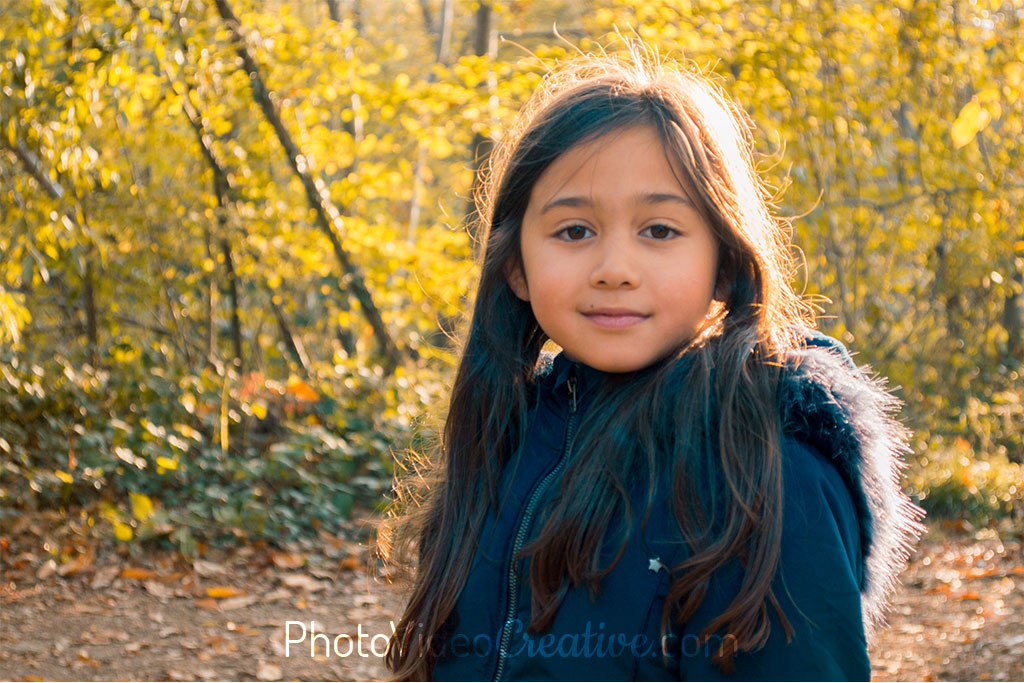
A beautiful background blur is a particularly desirable effect for portrait photos. But getting a blurred background is not so simple: you need to master the depth of field.
This will require some investment in good camera equipment, both for body camera and lens, as well as good shooting techniques.
I will share with you:
- The 5 shooting parameters to have a background blur
- The recent ability of high-end smartphones to blur a background
- The 5 shooting parameters to have an in-focus background
Before We Start
You do not know what depth of field is? You do not know the theory of emotions, nor the emotional effects of this technique of shooting? Read first my article:

Depth of Field and Your Emotions: Why Soft and Sharp Focus Reinforce Your Photo
How to Get a Background Blur With Your Camera
A background blur is a physical consequence of the laws of optics with a shallow depth of field (I will spare you the mathematical formulas!).
What you need to remember is that a background blur is favored by 5 shooting parameters:
- A large sensor size in your camera
- A large aperture of the diaphragm of your lens
- A great focal length of your lens
- A small focus distance between your subject and your camera
- A great distance between your subject and the background
1. Sensor Size for Background Blur
You can get a background blur with a camera that has a large enough sensor:
- 1″ sensor of high-end bridge cameras from Canon, Nikon, Sony or Panasonic
- Micro 4/3 sensor of hybrid cameras from Olympus and Panasonic
- APS-C sensor of Sony and Fuji hybrid cameras and all Canon, Nikon, Pentax and Sony entry level and mid-range DSLRs
- 24×36 full-format sensor for high-end Sony hybrid camera and mid-range and premium DSLRs from Canon, Nikon, Pentax or Sony.
The larger the sensor, the more pronounced is the blur effect will be, if all the other 4 shooting parameters remain constant.
In contrast, smartphones and their (very) small sensors are very disadvantaged.

2. Diaphragm Aperture for Background Blur
Your lens aperture constrains the amount of light reaching the camera sensor. The amount of light is modulated by a hole of variable size, the diaphragm, as the iris of our eye modulates the light that reaches our retina.
The opening is expressed by a division between the focal length f and a “magic” value which reflects the aperture size of the diaphragm: typically f/1.2, f/1.4, f/1.8, f/2, f/2.2, f/2.8, etc. Be careful, the bigger the division result, the brighter the aperture. For example, an f/1.2 aperture is brighter than an f/2.8 aperture!
Two lenses of different focal lengths let in the same amount of light for the same aperture. For example, a wide-angle 28mm lens opened at f/1.8 is as bright as a 85mm telephoto lens at f/1.8.
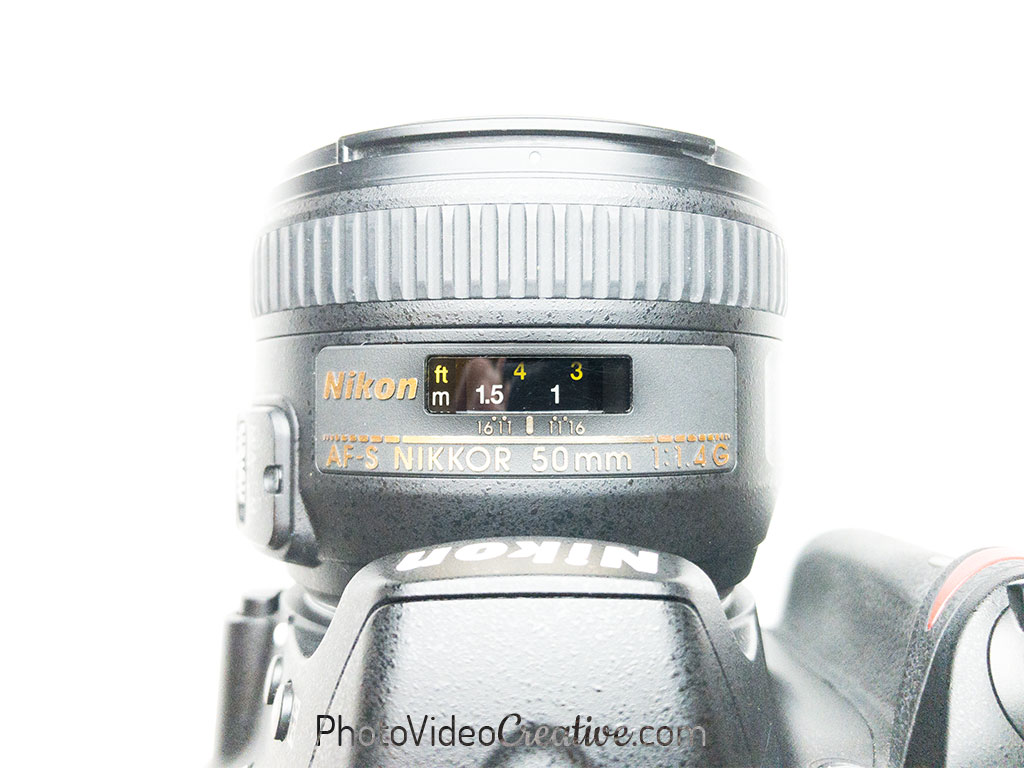
The brighter the photo lens (maximum aperture at f/2.8 or better f/2, f/1.8, f/1.4, …), the easier it is to obtain a shallow depth of field.
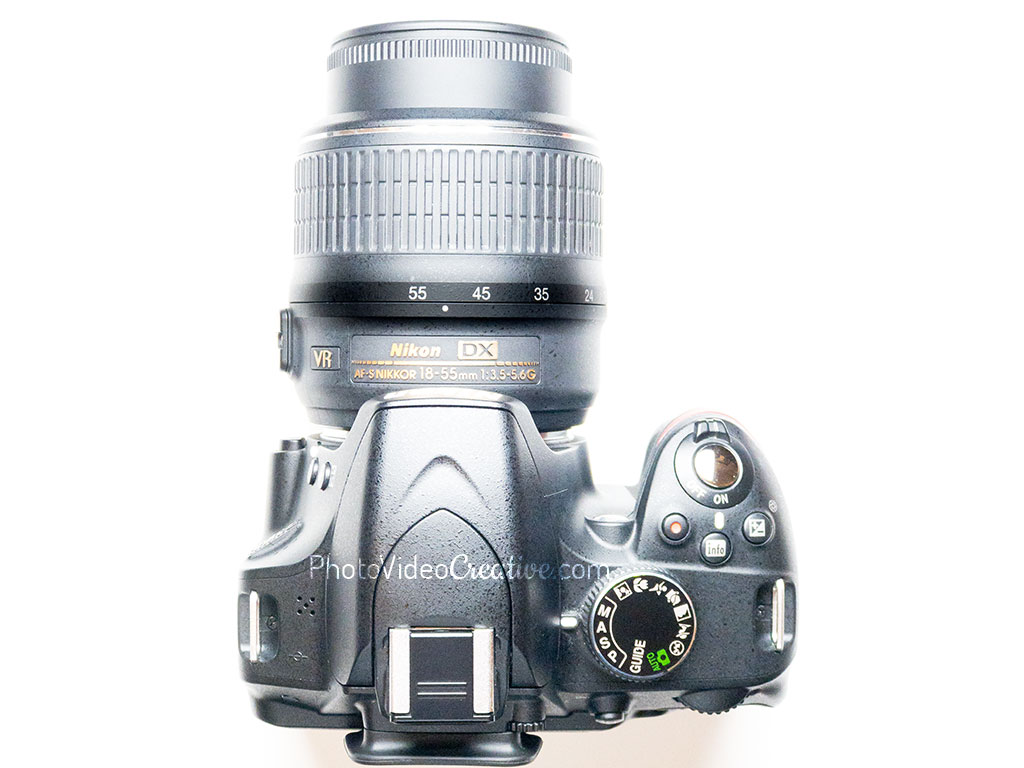
Entry-level lenses sold as a kit with DSLR or hybrids are often not that bright: typically f/3.5 for wide-angle focal, f/5.6 for long focal. This type of lens make a shallow depth of field less visible.
How can you set your aperture on your camera? Use the Aperture Priority shooting mode of your camera:
- A as Aperture for Fuji, Nikon, Panasonic, Sony, Olympus cameras
- Av as Aperture Value for Canon, Pentax cameras
Then with the knob, open the diaphragm to the maximum, or near the maximum for a less blurred background.


As for smartphones, they are little impacted by the aperture of their lens: they are generally very bright from f/1.8 to f/2.2.
3. Focal LengtH for Background Blur
The focal length of your lens determines the field of view of your environment and therefore the magnification of your subject in the photo.
The shorter the focal length, the smaller your subject is and the larger the environment is visible. A focal length lens of 28mm gives a wider vision compared to a 85mm lens, for example.
The longer the focal length, the larger your subject is and the smaller the environment is visible. An 85mm lens magnifies more the image than a 28mm lens.

To reinforce a small depth of field, it is necessary to favor the longest possible focal length, if the other 4 shooting parameters remain unchanged. For example, if you have a zoom lens like an 18-55mm on an APS-C, you should set it at 55mm.
On a smartphone or a compact camera with a fixed focal length lens, their field of view is always a wide-angle because of short focal length: from 24mm to 35mm in 24×36 full-size sensor equivalent. With their small sensor, it is the 2nd handicap that makes it almost impossible to have a shallow depth of field.
4. Focus Distance for Background Blur
The focus distance is the distance between your camera and your subject (or anywhere you have set the focus).
The closer you get to your subject, the lower the depth of field will be if the other 4 shooting parameters remain unchanged.
But getting too close to your subject can have an undesirable effect.
If you have a wide-angle lens (small focal length), you will see a more pronounced perspective effect. The perspective effect increases the size of the foreground and shrinks the background. For a portrait, the perspective effect will deform the face by disproportionately enlarging the nose against the ears. It’s often contrary to the emotions you want to convey in your photo. And why we should avoid too close portraits with a smartphone: because of their wide angle lens.
Also with a moderately bright lens and a limited maximum focal length (typically f/5.6 at 55mm with a 18-55mm zoom lens of an APS-C sensor camera), it can be risky to have a shallow enough depth of field without deforming your subject, because of the perspective effect.
5. Distance Between Subject and Background for Background Blur
To maximize a shallow depth between your subject and his environment, you must choose your background and put it as far as possible from your subject.
With a camera with limited capabilities (like an APS-C camera with an 18-55mm zoom lens with a maximum aperture of f/5.6 at 55mm), it is the shooting setting that can save your photo.
To have a beautiful background blur, prefer large spaces (a large garden, a large room, etc.) where you can place your subject far enough from the background.

Under these conditions, even with a smartphone that is limited by its small sensor and short focal length, you can shot photos with a relatively small depth of field. And you have to be as close as possible from your subject (but mind the perspective effect!).
Latest Generation Smartphones and Simulated Background Blur
I promised you 5 and 1 secrets on the depth of field, here is the last one!
You have just seen it, smartphones are struggling to make photos with a beautiful background blur.
But this is not quite true since 2016.
With the release of Apple iPhone 7 Plus and its dual lenses capable of seeing in 3D, it is now possible to simulate a convincing shallow depth of field after shooting. Today, more and more high-end smartphones offer this possibility.


In a short time, the simulated depth of field feature will become totally mainstream! But beware, there are still situations where this simulation looks fake: when the brightness is too dark or when there are too many fine details like hair against a textured background for example.
So, do not throw away your big camera yet for a trendy smartphone!
How to Get a Sharp Focus Background With Your Camera
It’s easy, just do the exact opposite for a background blur and get a deep depth of field!
An sharp focus background is favored by these 5 shooting parameters:
- A small size sensor in your camera
- A small aperture of the diaphragm of your lens
- A short focal length of your lens
- A long focusing distance between your camera and your subject
- A short distance between your subject and the background
Here, smartphones are unbeatable, because even with a moderate focus distance (just over a meter), you get a great depth of field right away.
On cameras with larger sensors (hybrids, DSLRs, …), it is necessary to close the diaphragm sufficiently to grow the depth of field (typically f/11 or f/16 on a camera with APS-C or full size sensor).
It will be necessary to ensure that the other exposure parameters (exposure time and ISO sensitivity) are compatible with your choice of shooting. Be careful not to have too long exposure time which raise the risk of motion blur, or too high ISO sensitivity which increases image graininess that gets too disturbing. To avoid this, you may use a tripod.

What Do You Think?
Do you feel more confident to get a background blur? Do you now understand why more expensive equipment (larger photo sensor and brighter lens) allows you to take photos with shallow depth of field? Or do you feel limited by your camera to get a shallow depth of field?
Leave me your comment, I will answer with pleasure.
Do you like what you’ve learned? Share this article!